


|
|
![]()
![]()
![]()
![]()
![]()
VOLUME SIX - ISSUE THREE |
||||||||||||||||||||||||||||||||||||||||||||||||||||||||||
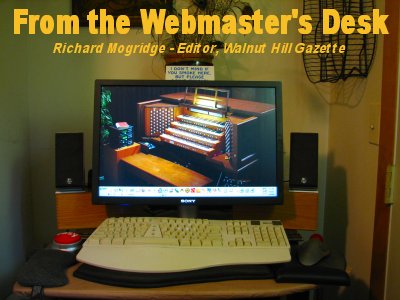
Walnut Hill Gazette
|
||||||||||||||||||||||||||||||||||||||||||||||||||||||||||
ORGAN OF THE MONTH
|
||||||||||||||||||||||||||||||||||||||||||||||||||||||||||
|
|
|||||||
|
Welcome to the Walnut Hill Gazette. The month of December sees the site reaching over 78,050 visitors, the average now being around 800 visits per month. During 2007, we broke an attendance record with 26,442 viewers. Many of these folks are young people from the large art communities in cyberspace, where we have built portal pages such as those at YouTube, Last.FM, deviantART and Renderosity, just to name a few. I want to thank each and every person who visits this site as the Winter Season gives way to Spring. Without you, our loyal patrons, there would be no Walnut Hill. We are indeed making a difference in the Land of the King, preserving a wonderful and important slice of American and World History. Blessings be to one and all.
Richard Mogridge |
|||||||
HEADLINE NEWS |
|||||||
|
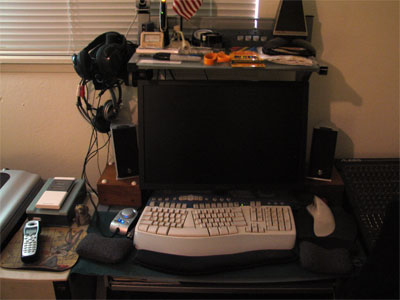
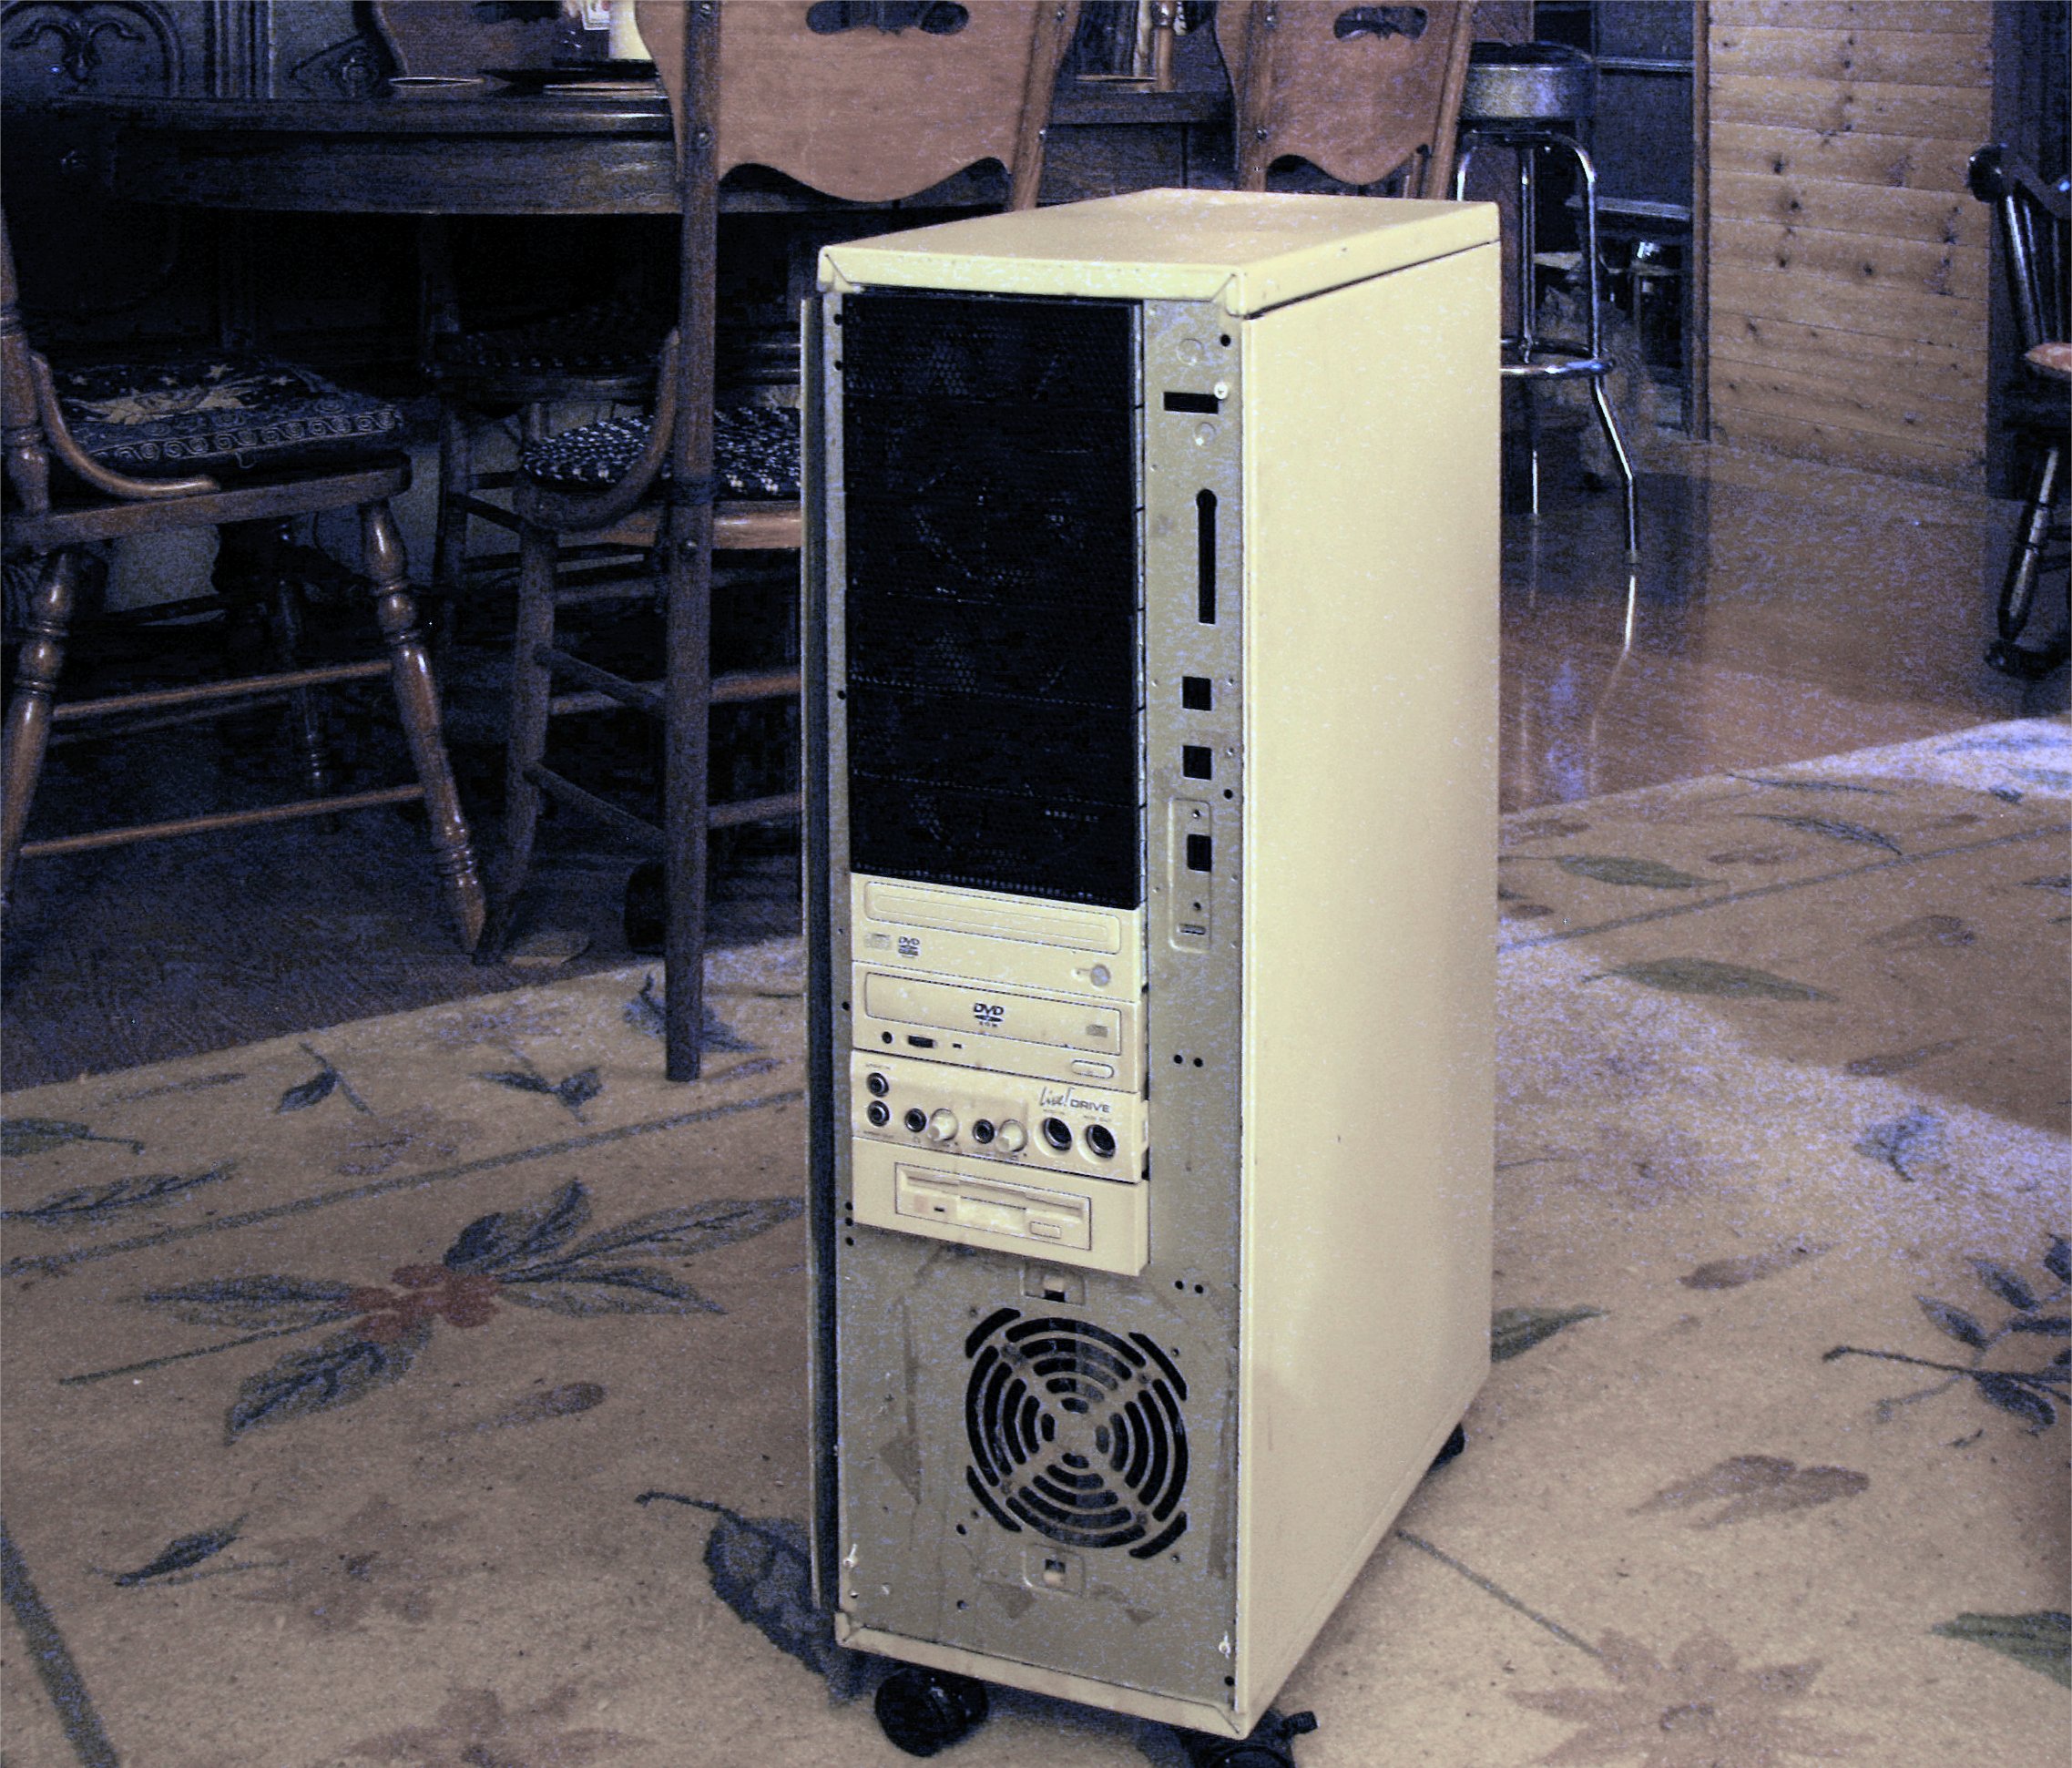
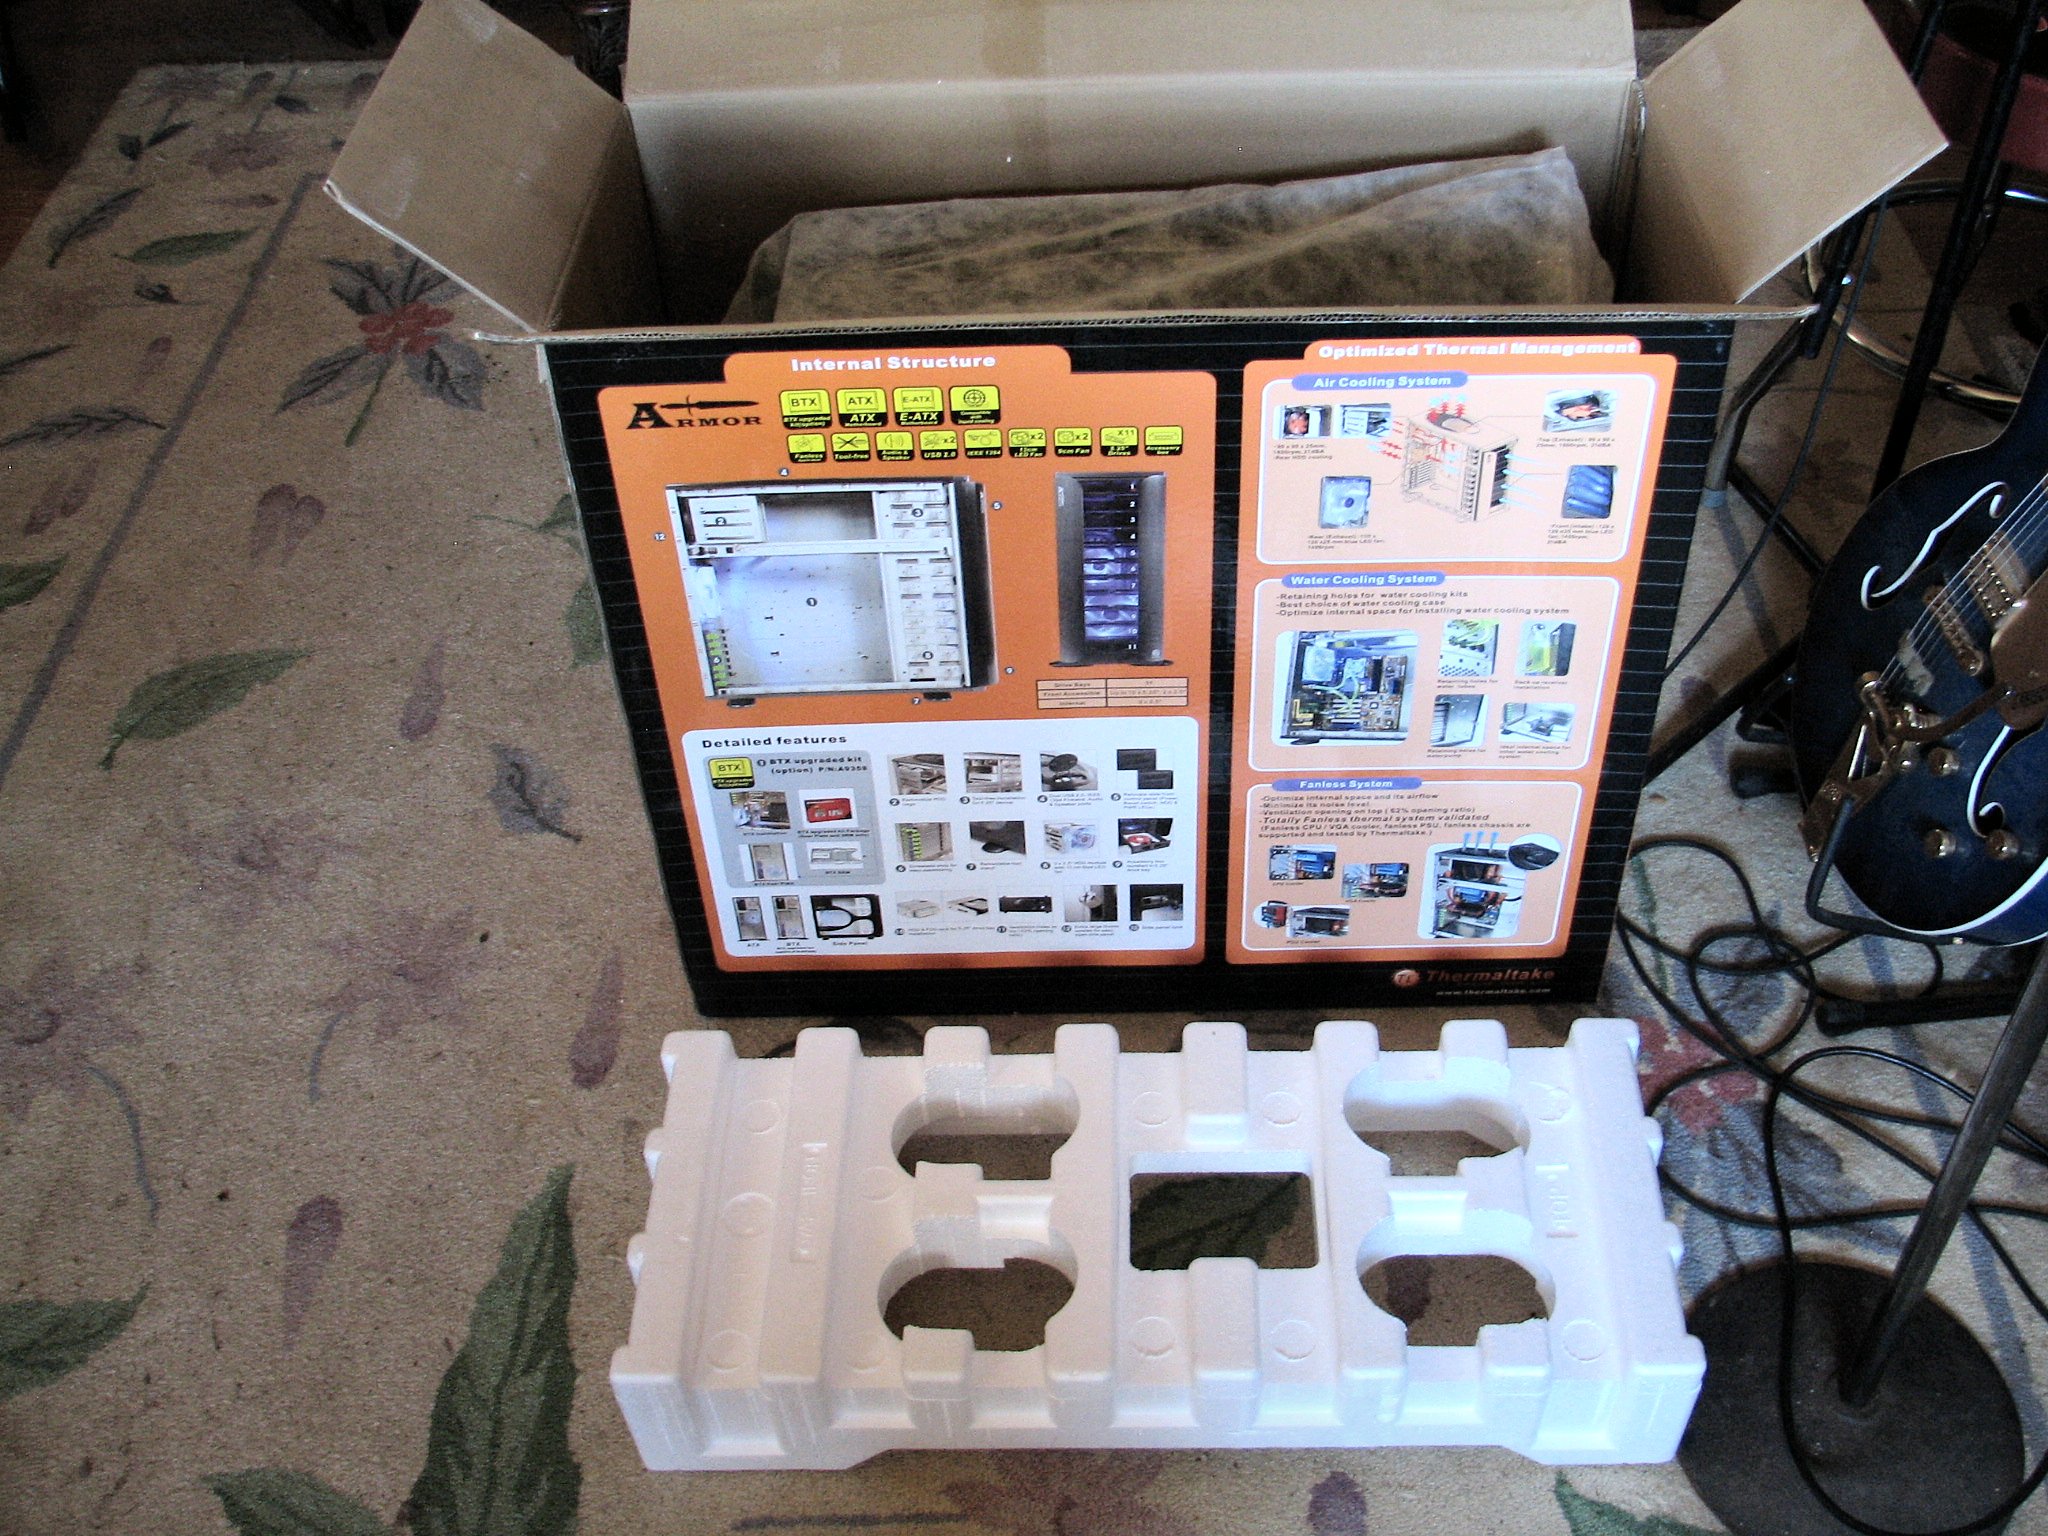
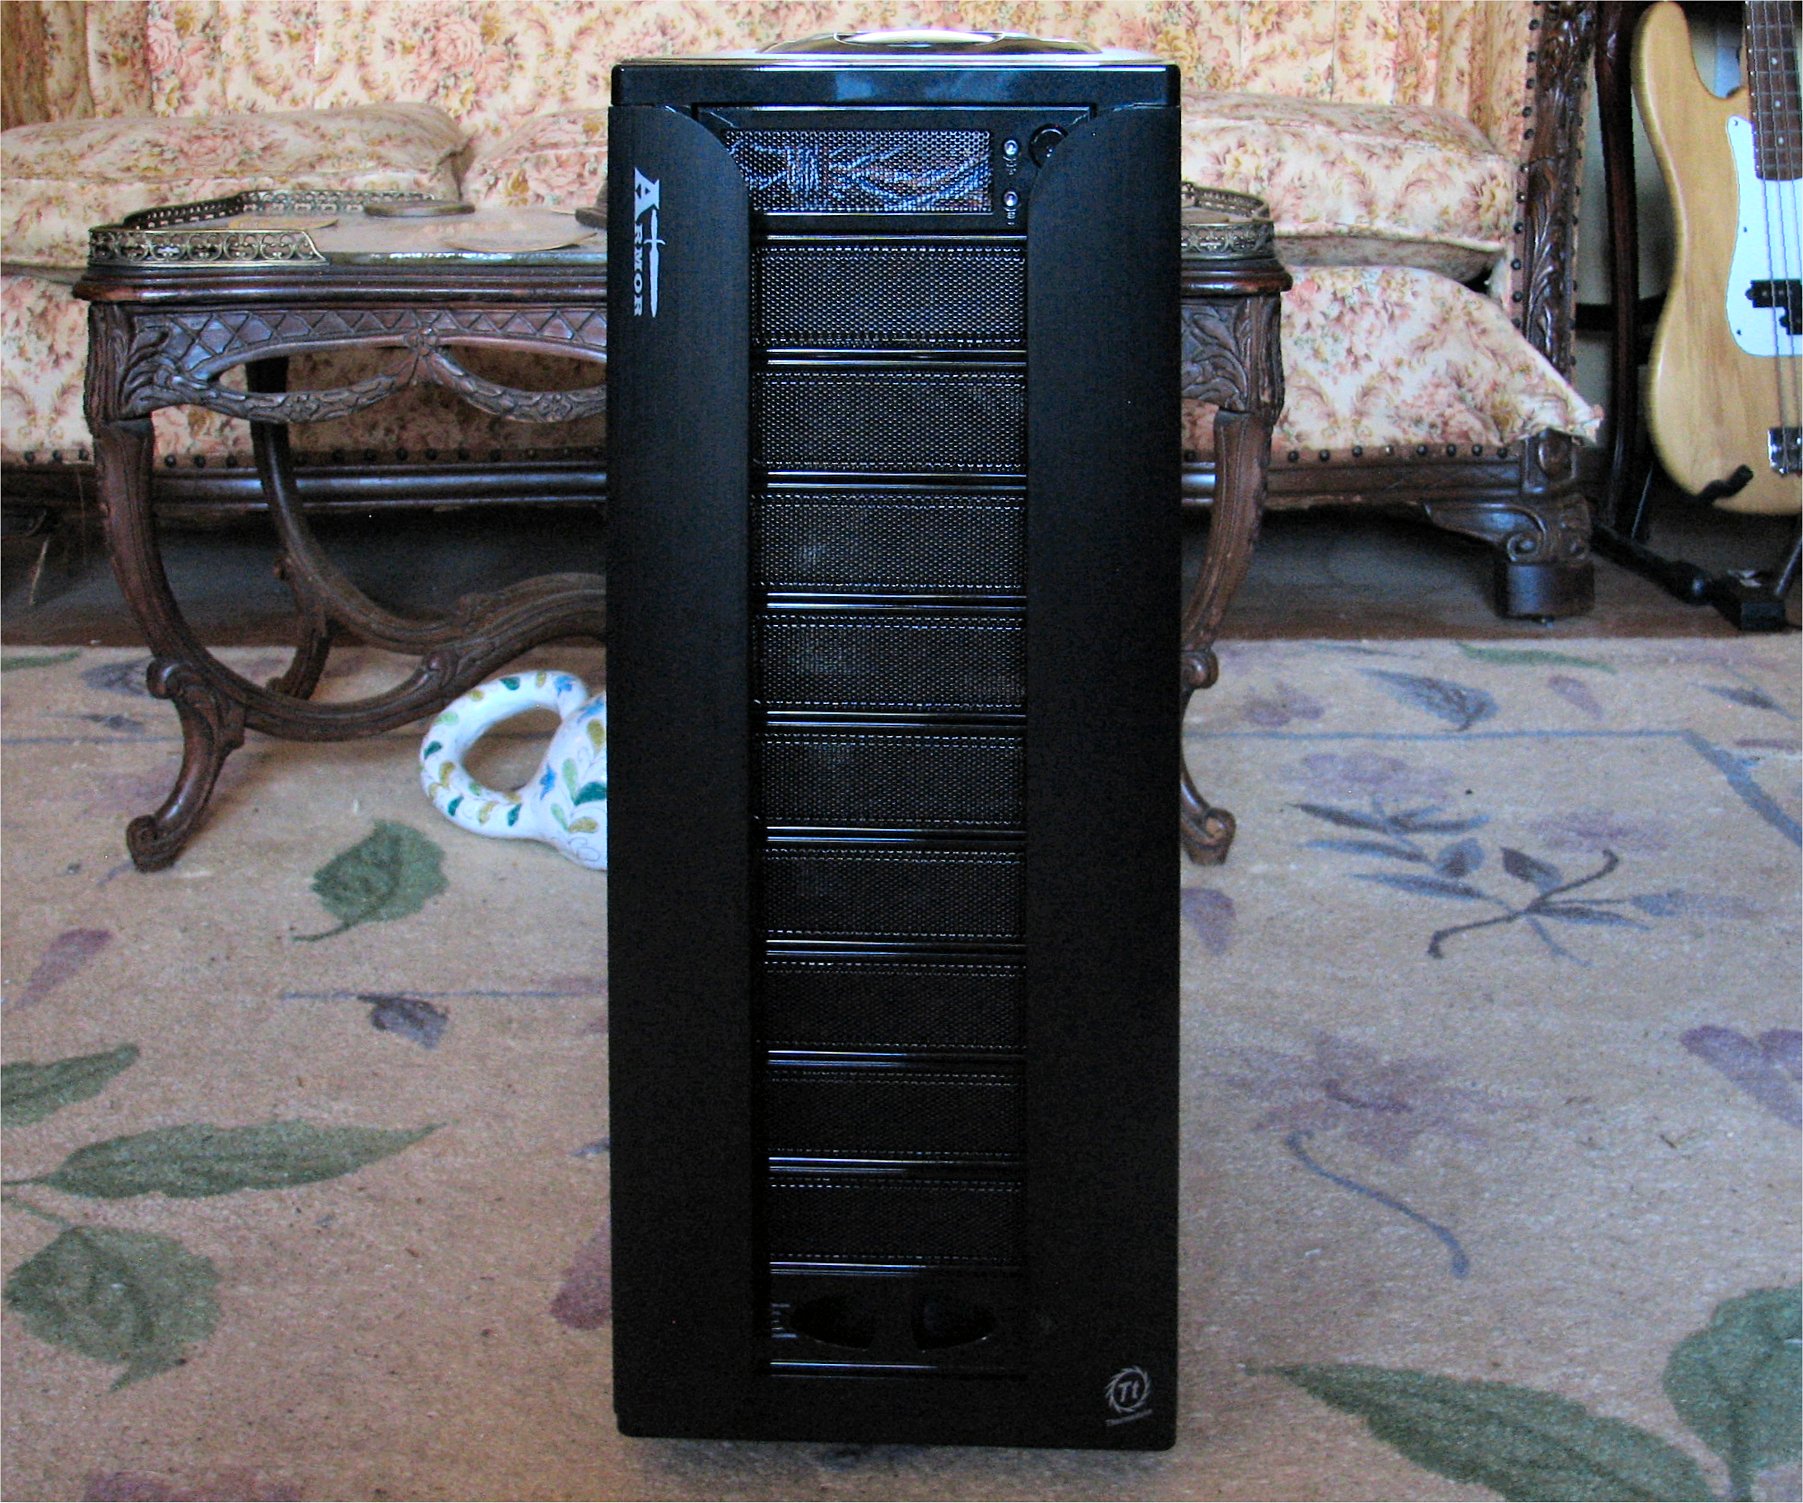
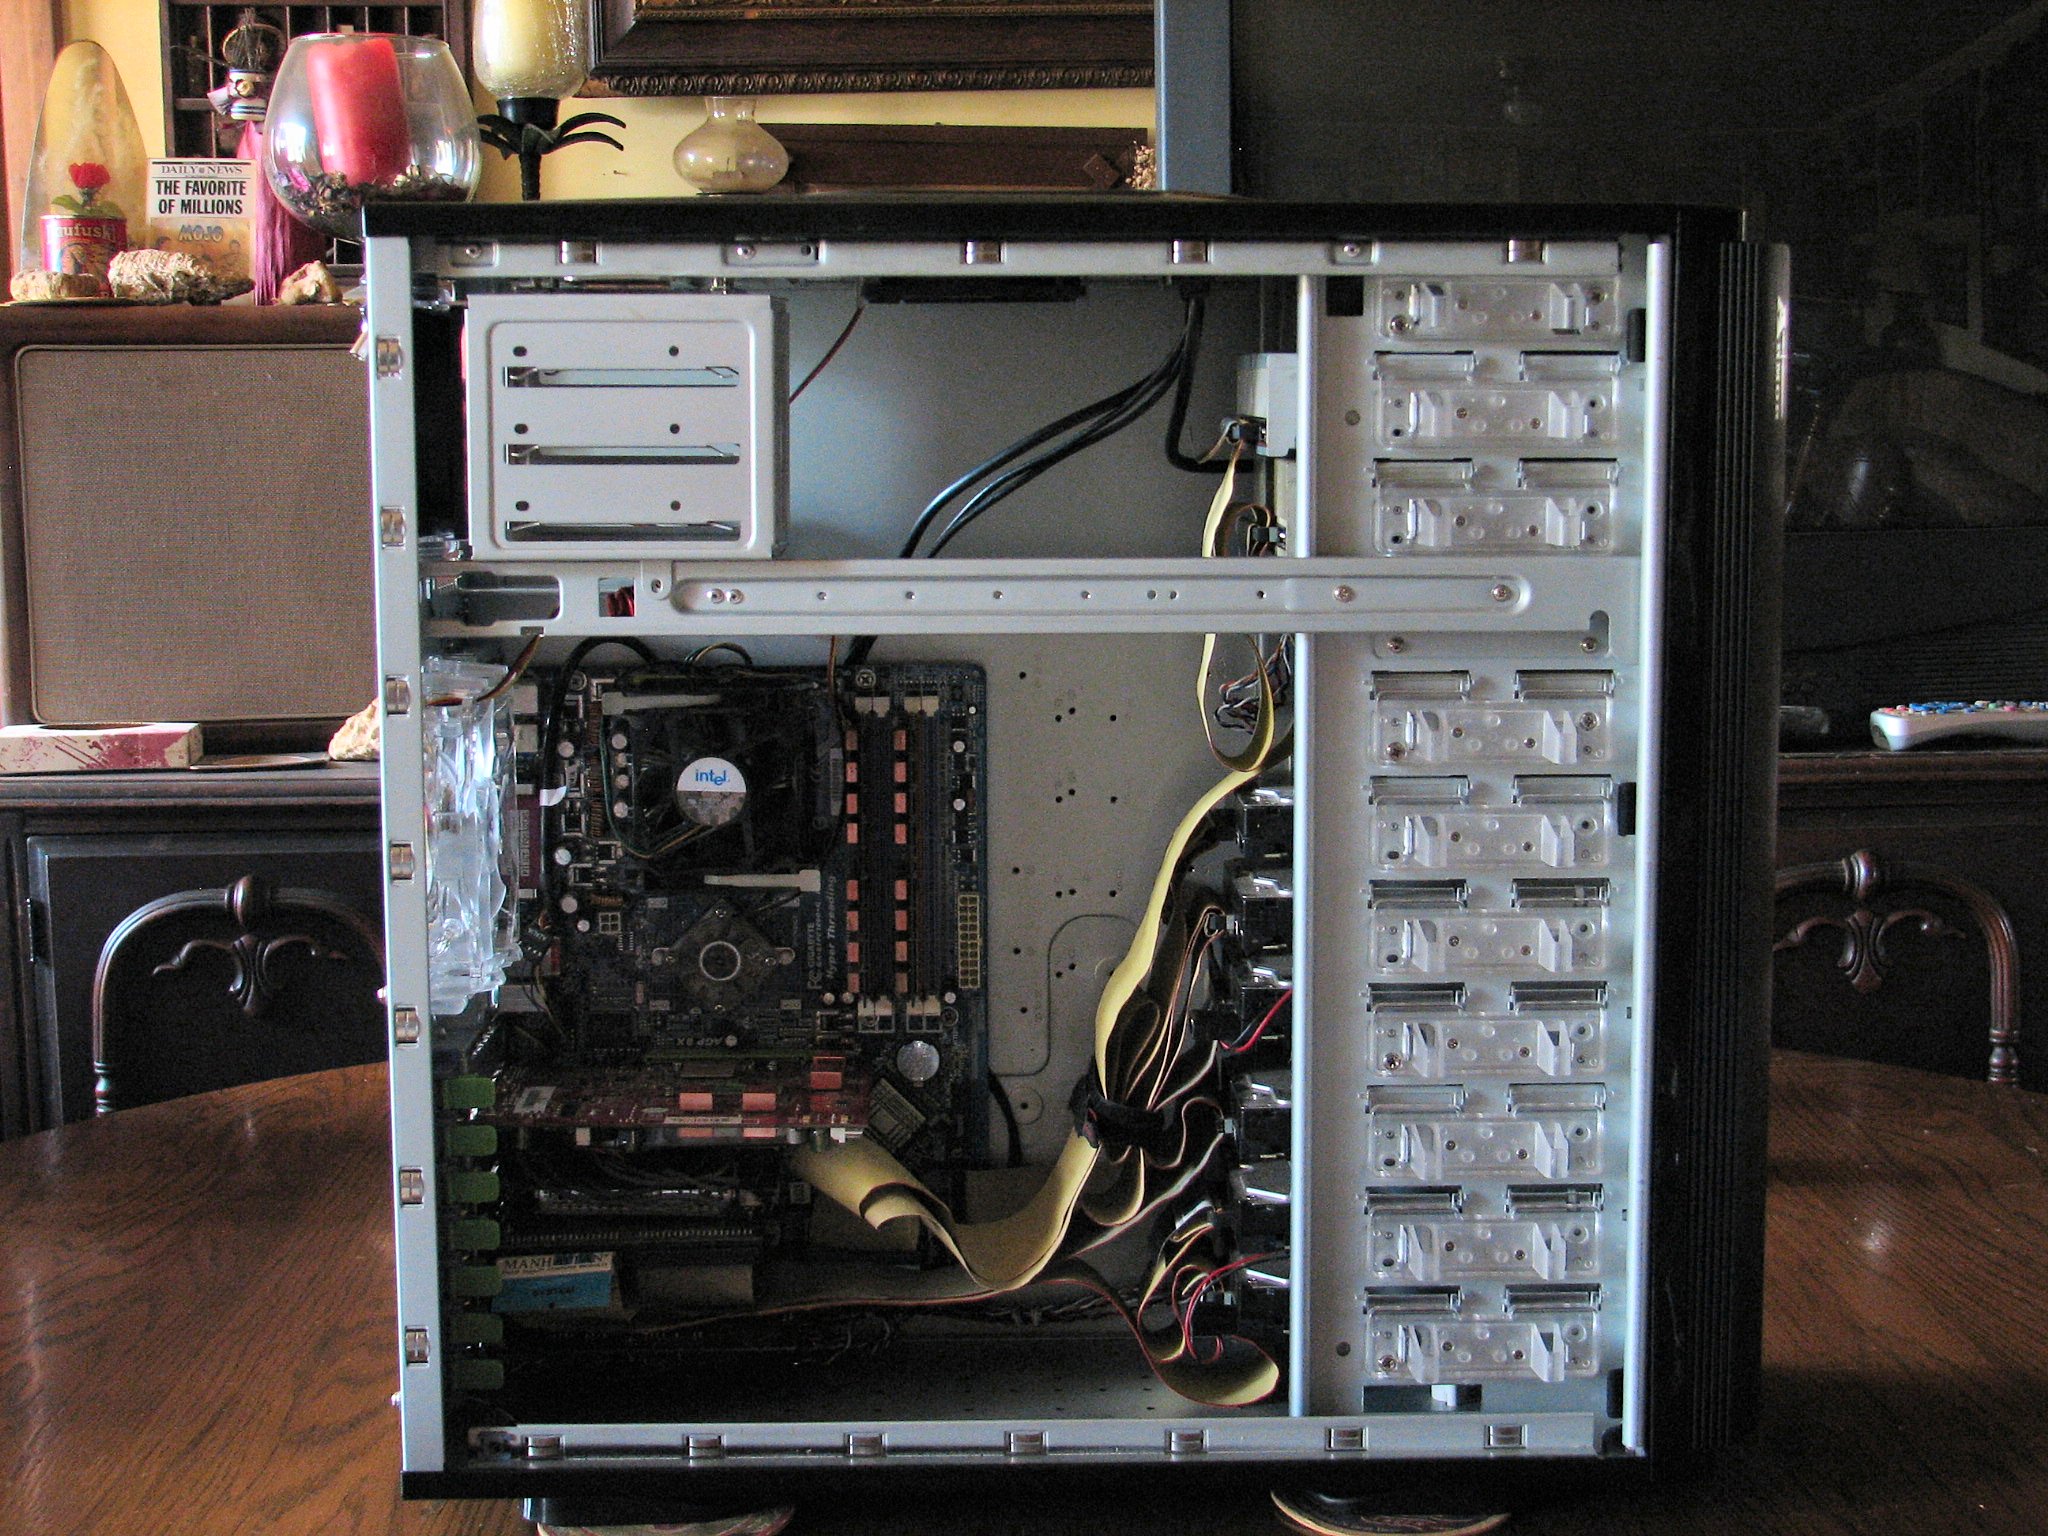
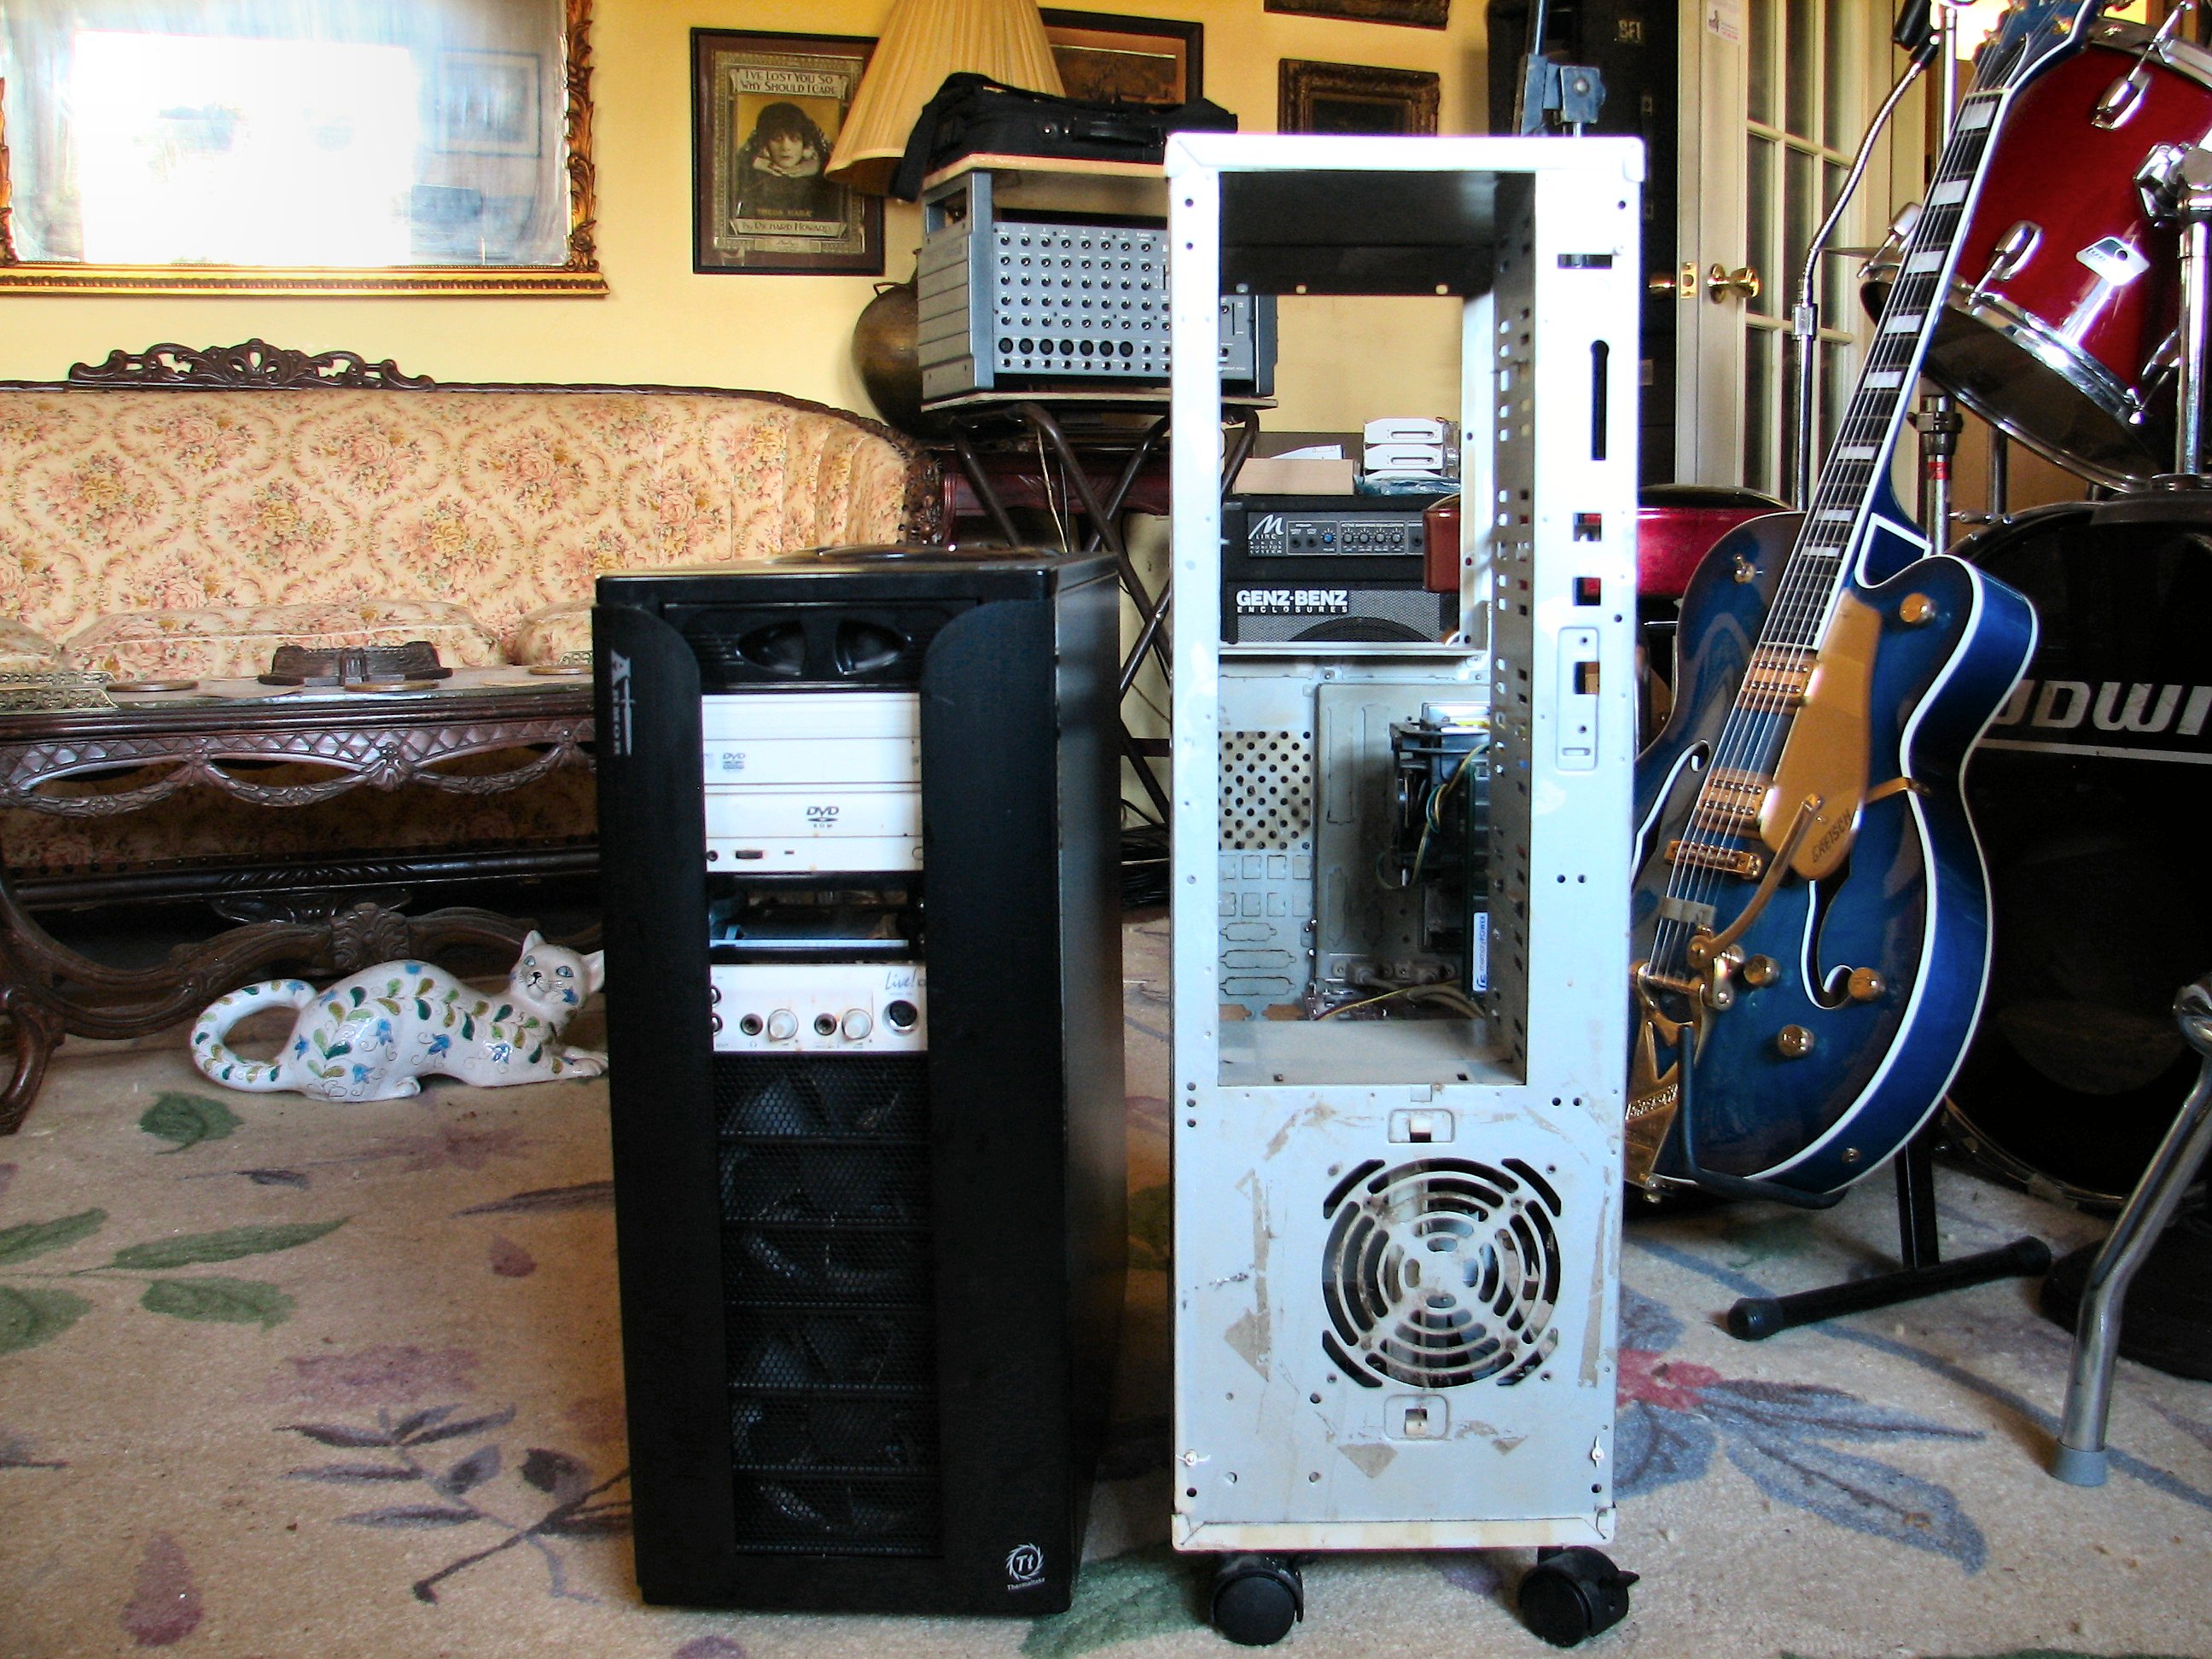
Rebuilding Delilah, Phase OneAs mentioned in the Opening Message, Walnut Hill has fallen behind on website administration and other vital projects as a result of extensive damage to the main data server during shipment from California to Tennessee. The old case is seen above, showing the broken screw mounts for the front bezal which was removed for this shot.
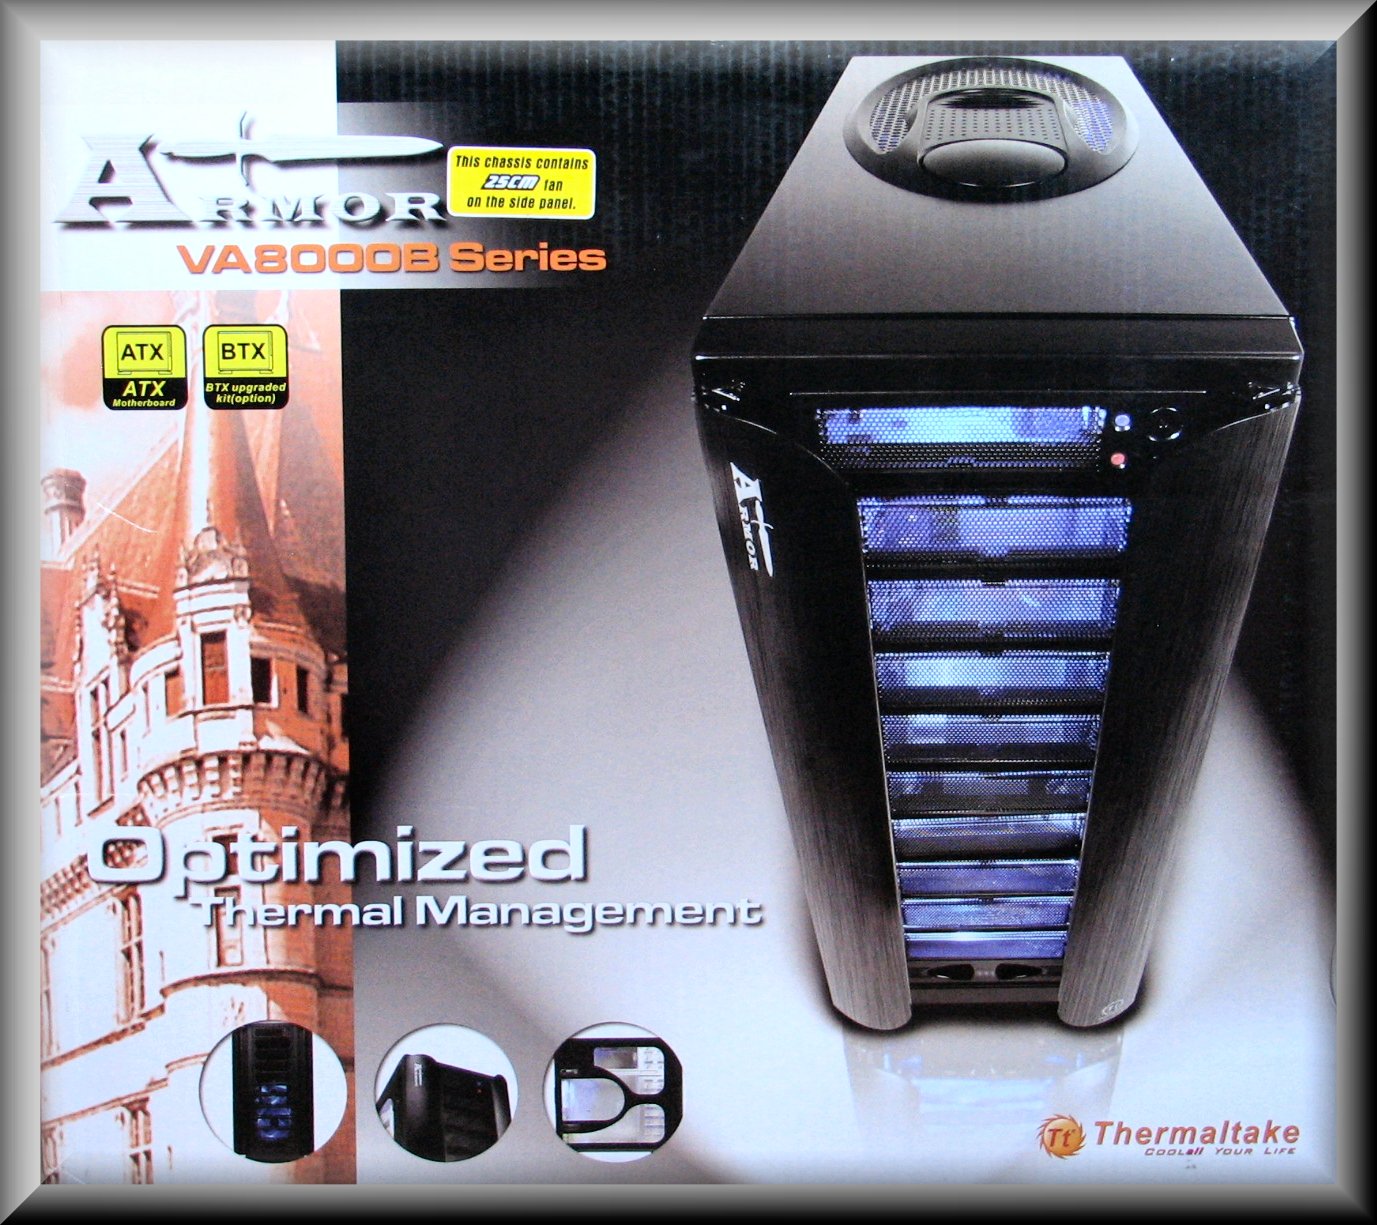
My aging Windows Server 2003 SP2 Enterprise Edition machine outgrew its old but trusty super tower case on wheels. I looked at over 200 cases to find this one for use as a system rebuild. I knew of the Newegg store for years. Knowing Thermaltake's reputation first hand, I read hundreds of reviews on the Armor, visited the Tt site, downloaded all docs and mulled it over for a week. On 2/27/09, I ordered the big tower. It arrived three business days later.
Having used many great Tt products before, I put my trust in this case based on looks, functionality, size, and price. It was the clear winner, and I knew it would make a great server box. The Armor replaces a Dynamax server tower of about the same internal volumetric size. The old Dyno was great, but when I moved to Tennessee from SoCal, FedEx handled her like a gang of rabid gho-rillas and destroyed the server's Dyno home. The new case has all the right parts in all the right places. It has room to grow. I will be putting a lot of gear inside and there will still be room for more stuff! I can see from all I have learned so far that the OEM tool free PCI retention device will be taken out in favour of screws. I would have preferred casters to swing out feet. A machine like this draws a lot of dirt inside. Being heavy and not on wheels, it is difficult to move. The solution is to put teflon pads on the swing out feet or swap the feet for casters. They are easily removed. An alternative would be a custom built dolly to place the case upon. I would have preferred the front panel ports to be on the front rather than beneath a plastic lid on the top. Some have said that this lid will not stay open. The solution is to add a sheet steel spring under the hinge arms to keep it open. My main gripe is the PSU space will not house a dual redundant server PSU cage like the one in my old Dyno tower. Thus, I had to buy a new PSU. For that, the PC Power and Cooling 750 Quad Blue should do nicely. It fits perfectly in the space provided and allows the extra hard drive cage to remain in place since the PSU vents out the back and not the bottom.
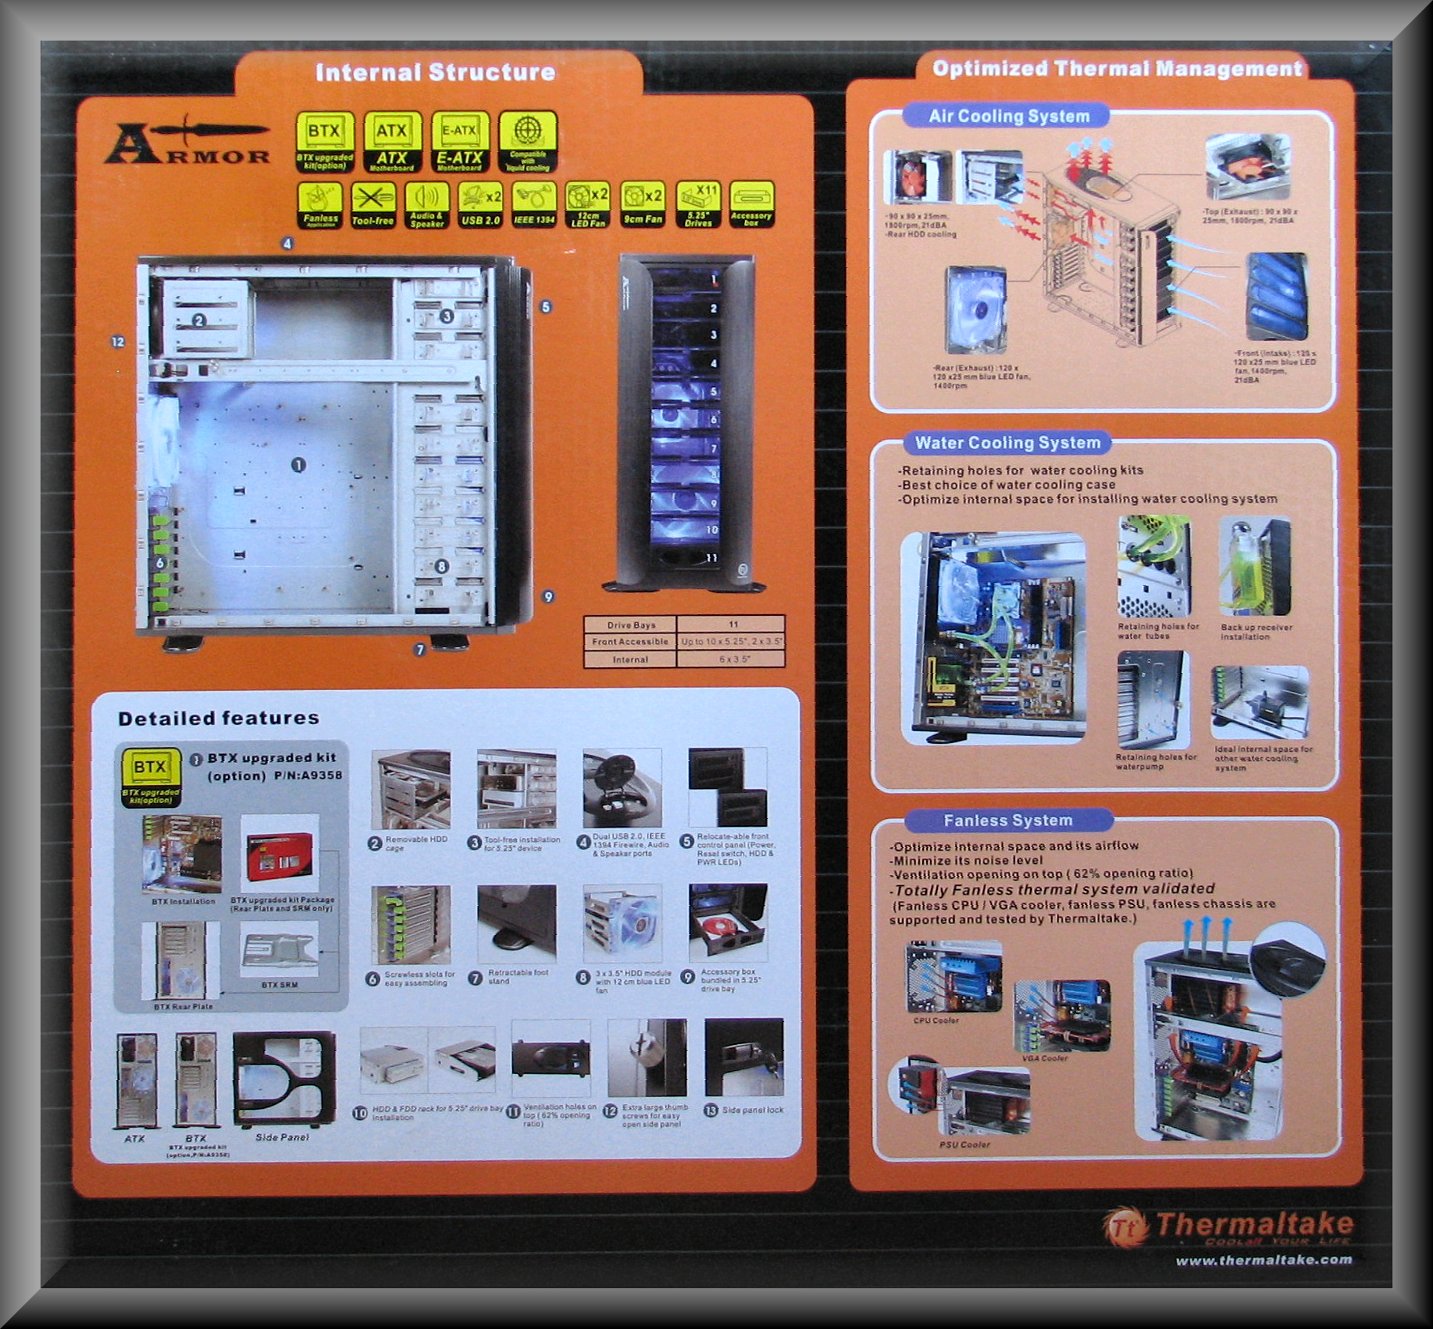
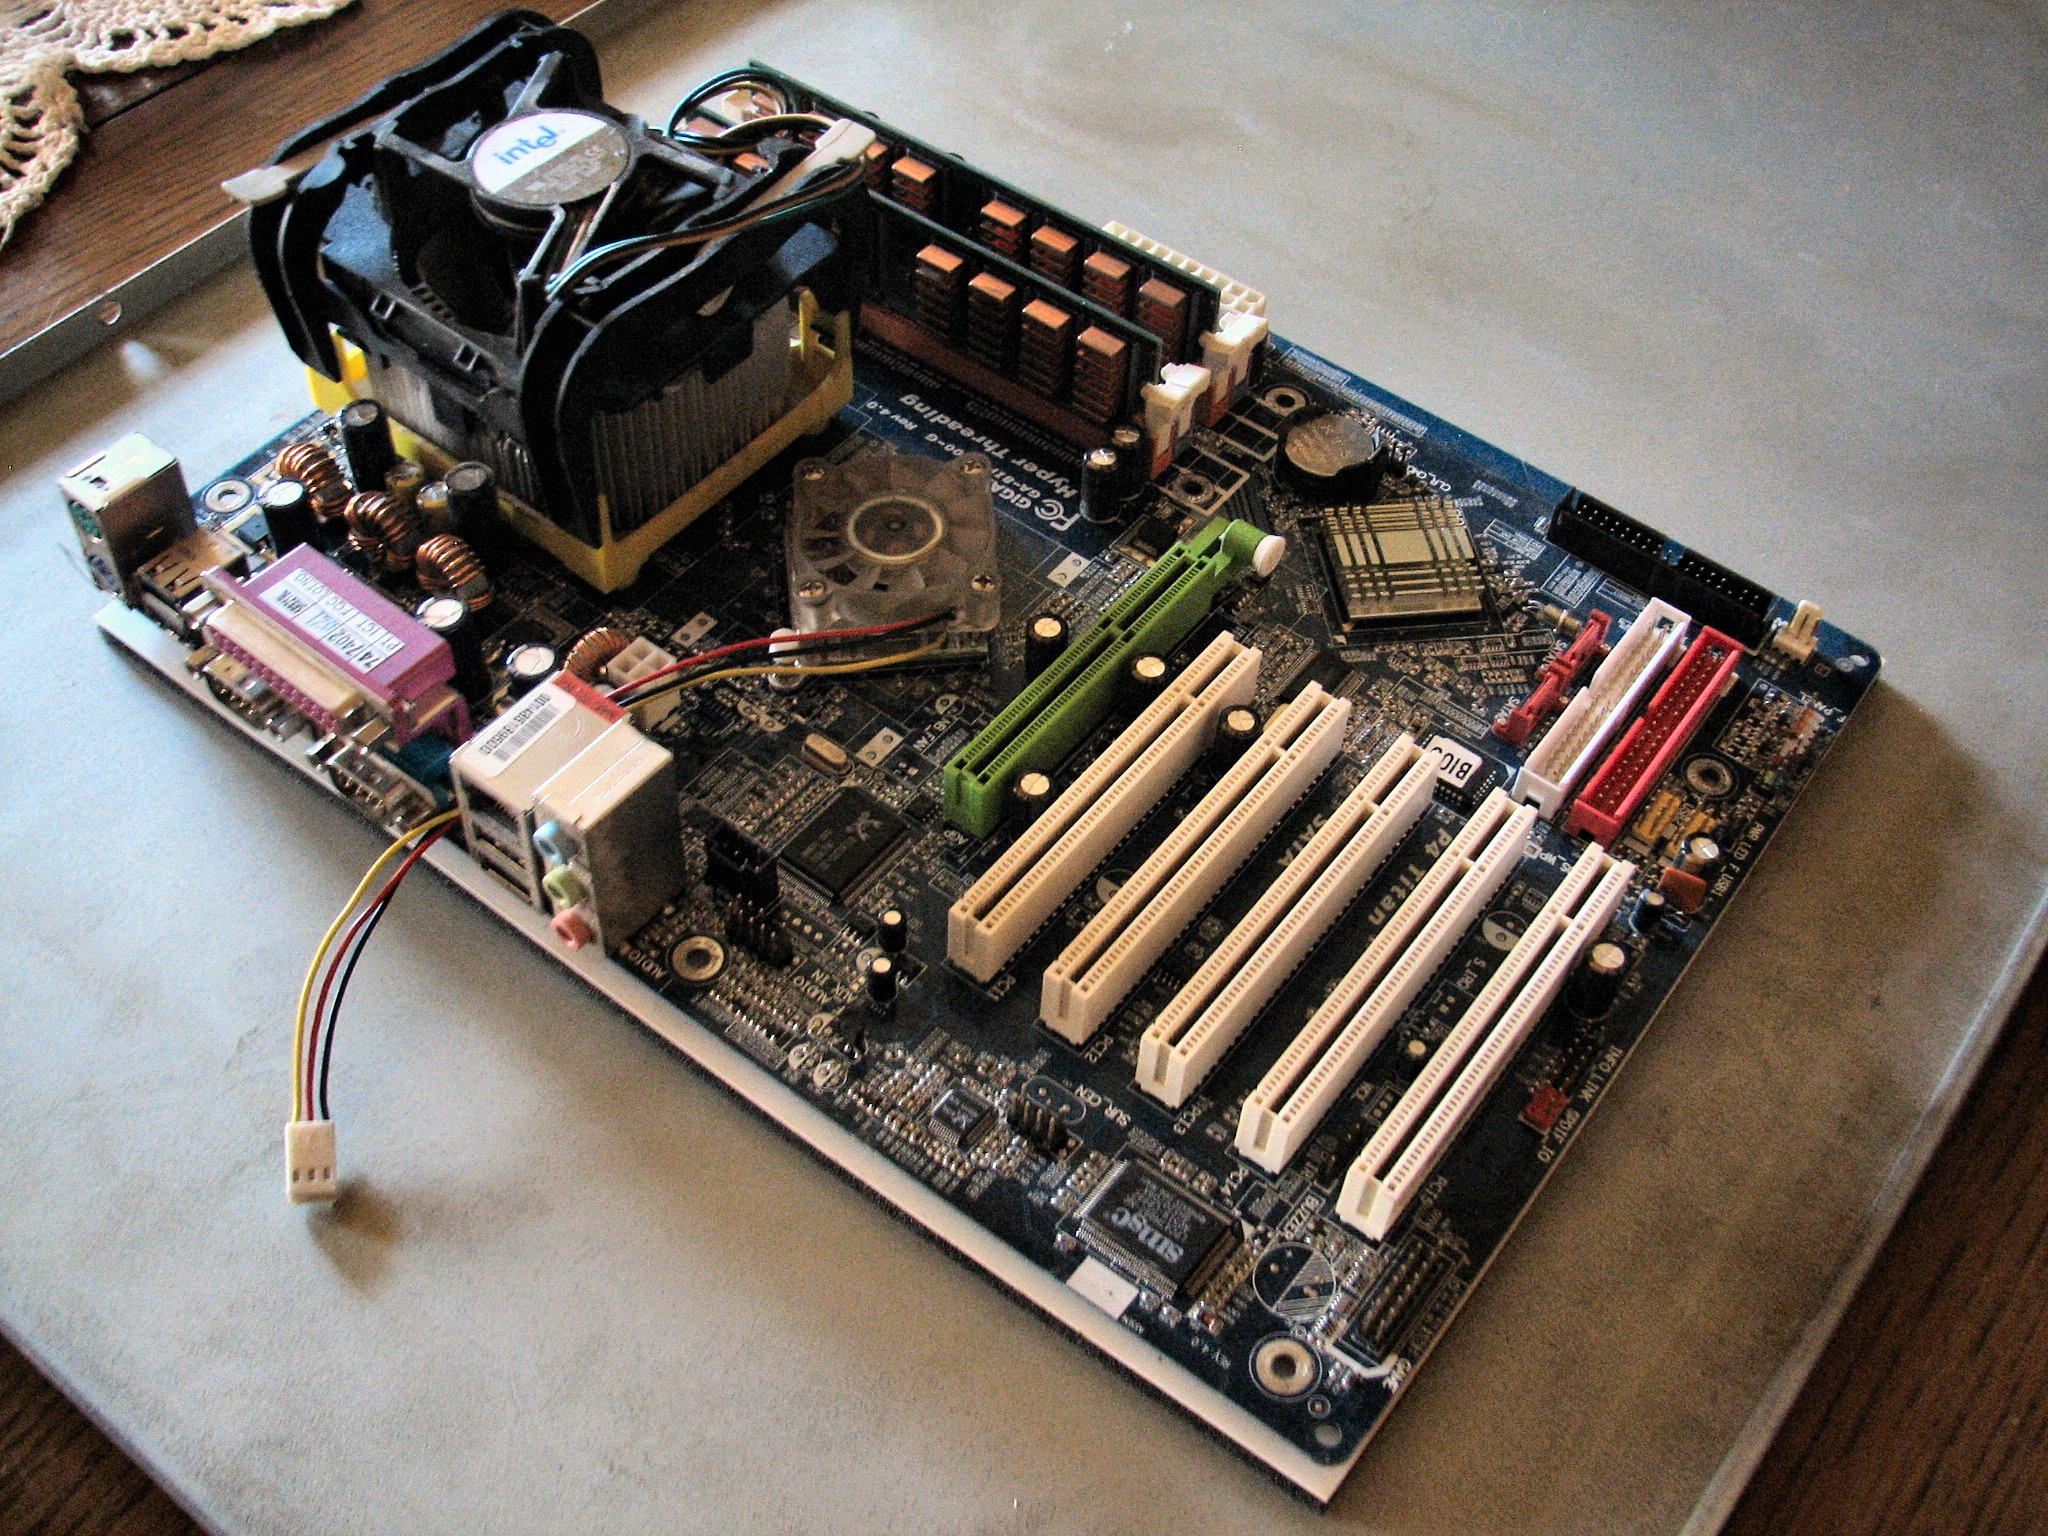
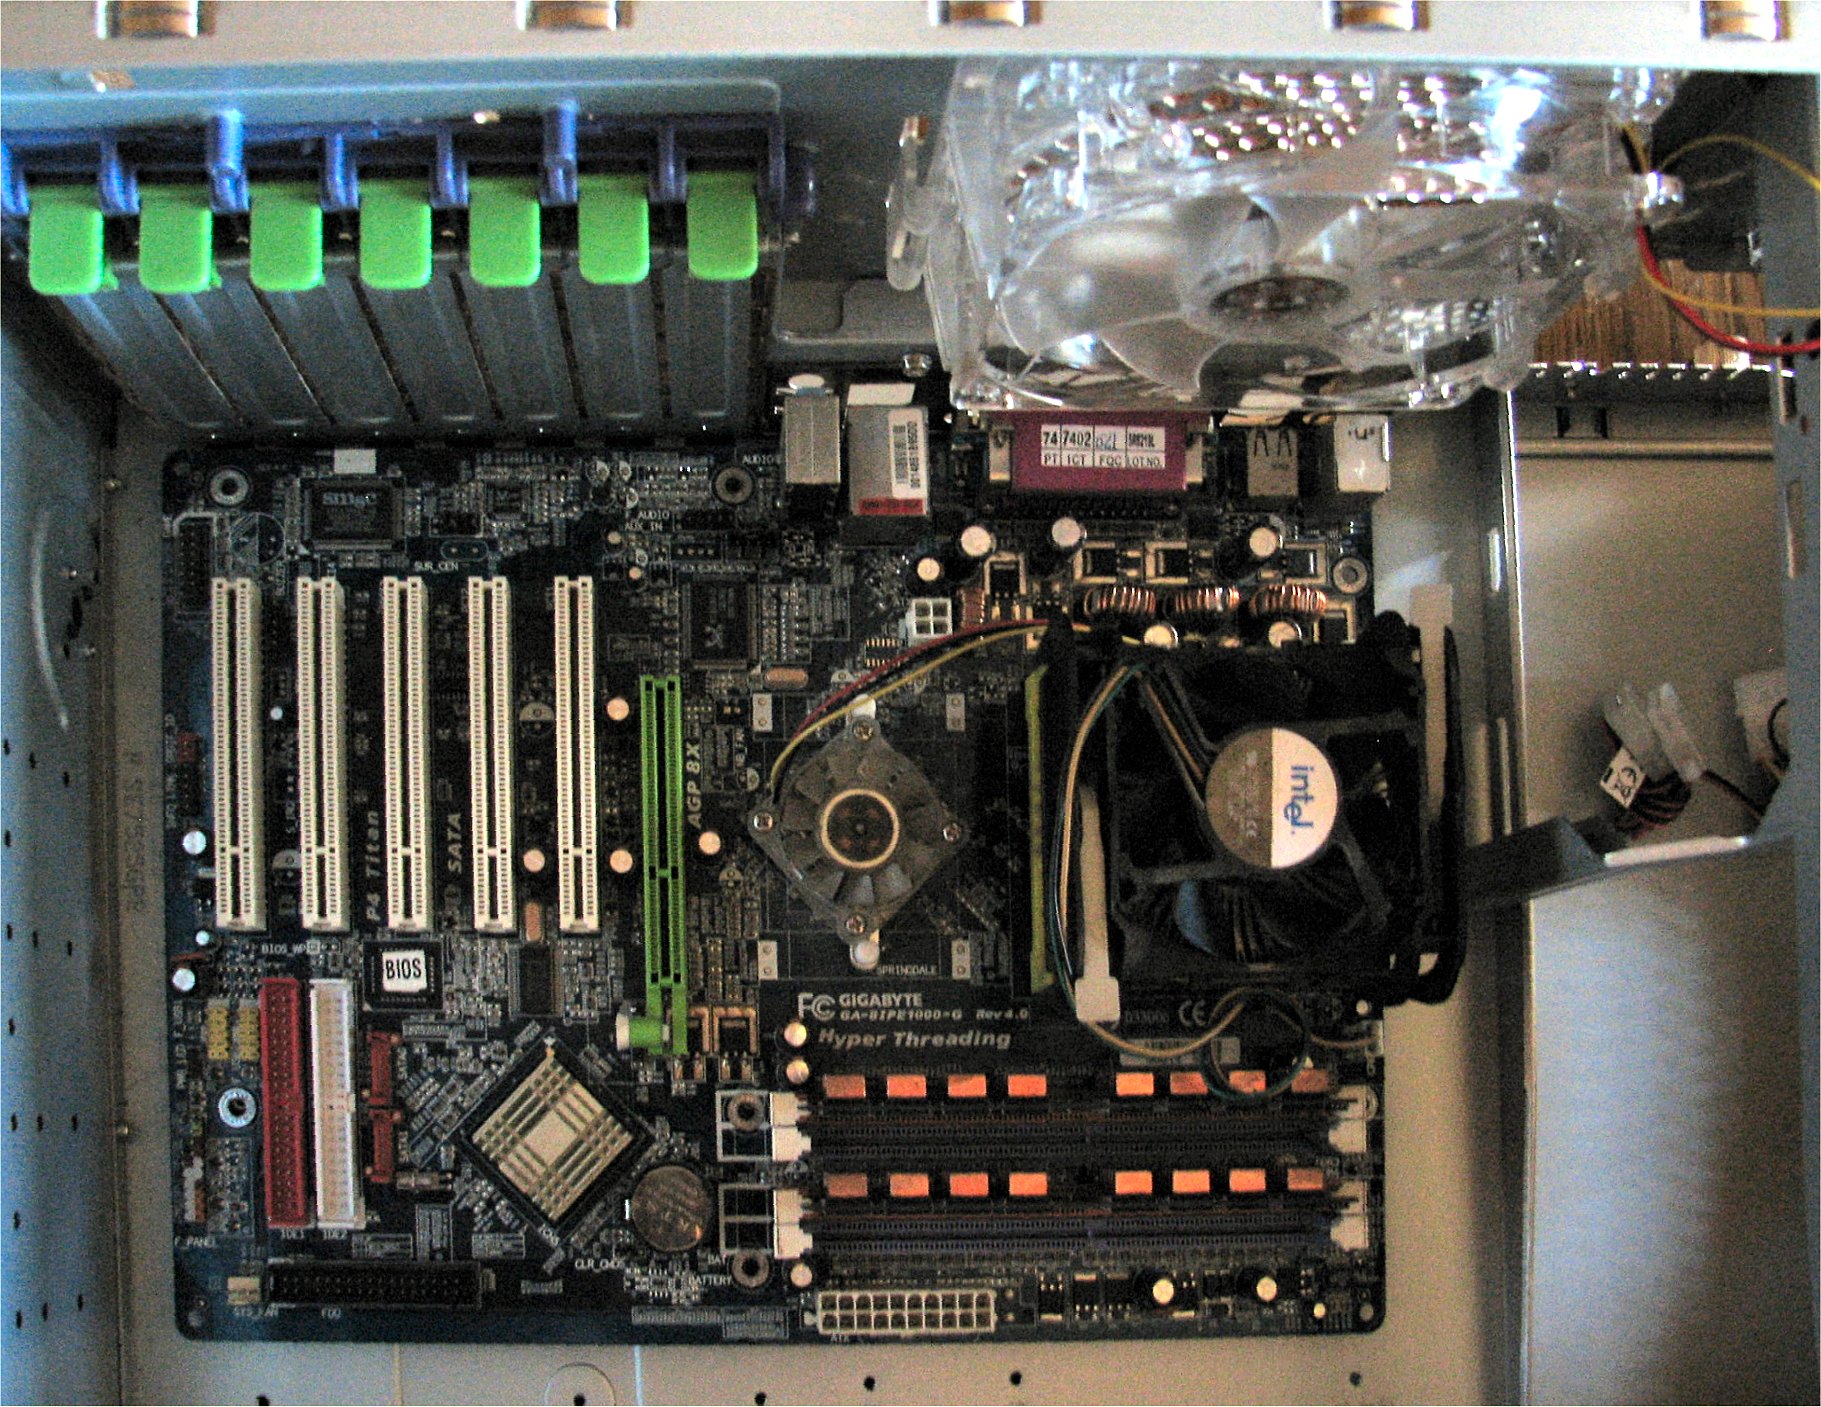
This very sturdy super tower case will house Walnut Hill's old but dependable data server. This unit, affectionately referred to as Delilah, has been through four rebuilds in three cases. Hopefully, this will be her last tower. Specs are:
The Armor arrived at MOJO Ranch via UPS truck freight three days after ordering it online. The sturdy shipping box was longer than it was tall, being large in all three dimensions and printed with lots of info and pictures pertaining to its contents. The unit was packaged well and arrived without a scratch nor blemish. Even the shipping box faired well. After reading the manual and unpacking all the parts bags, I had a thorough understanding of the case.
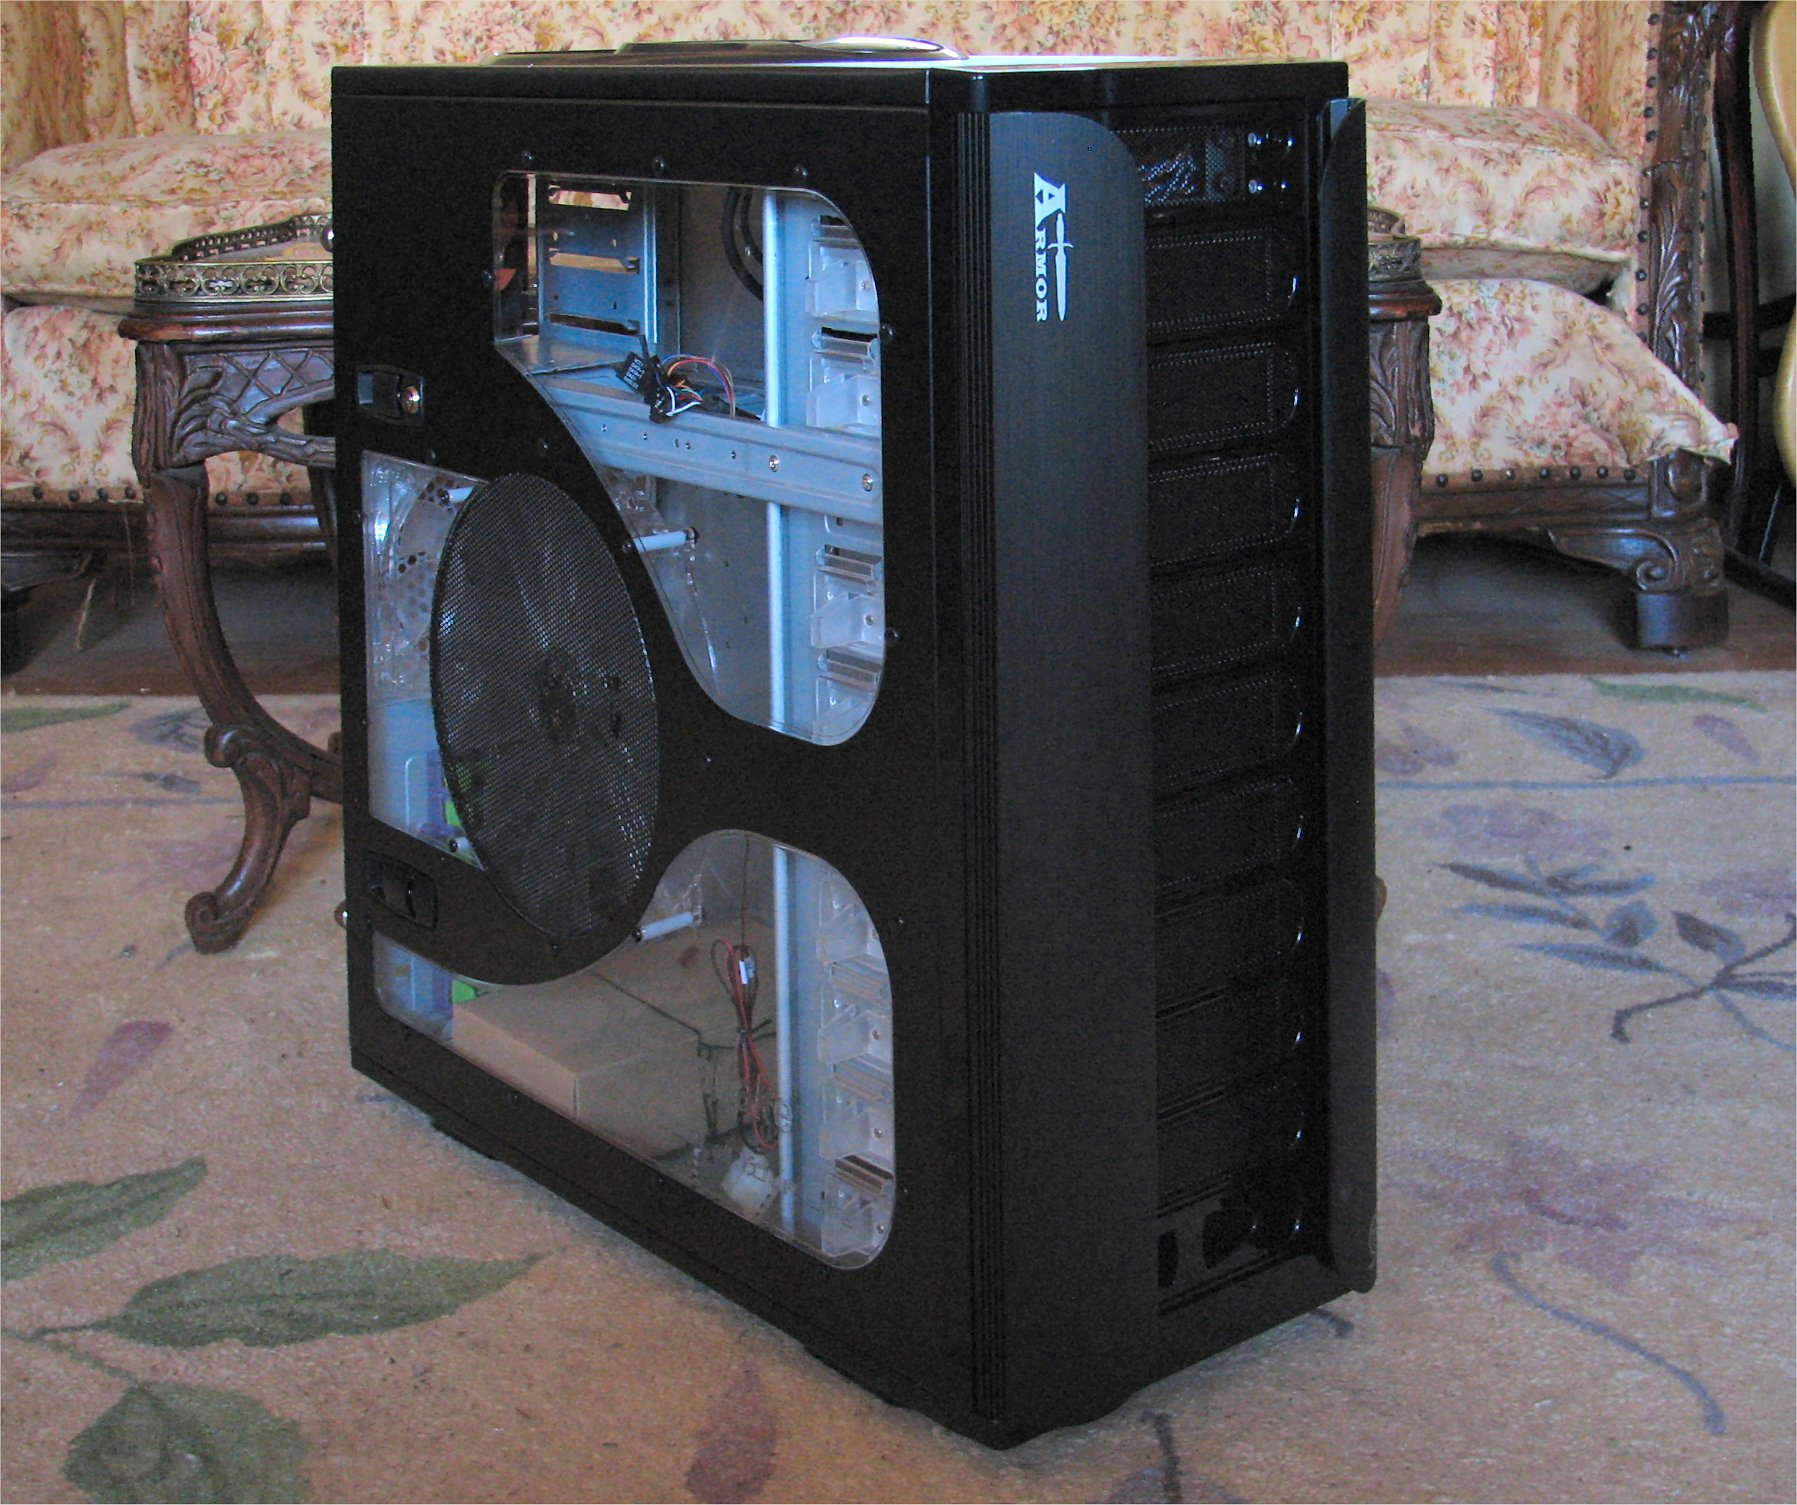
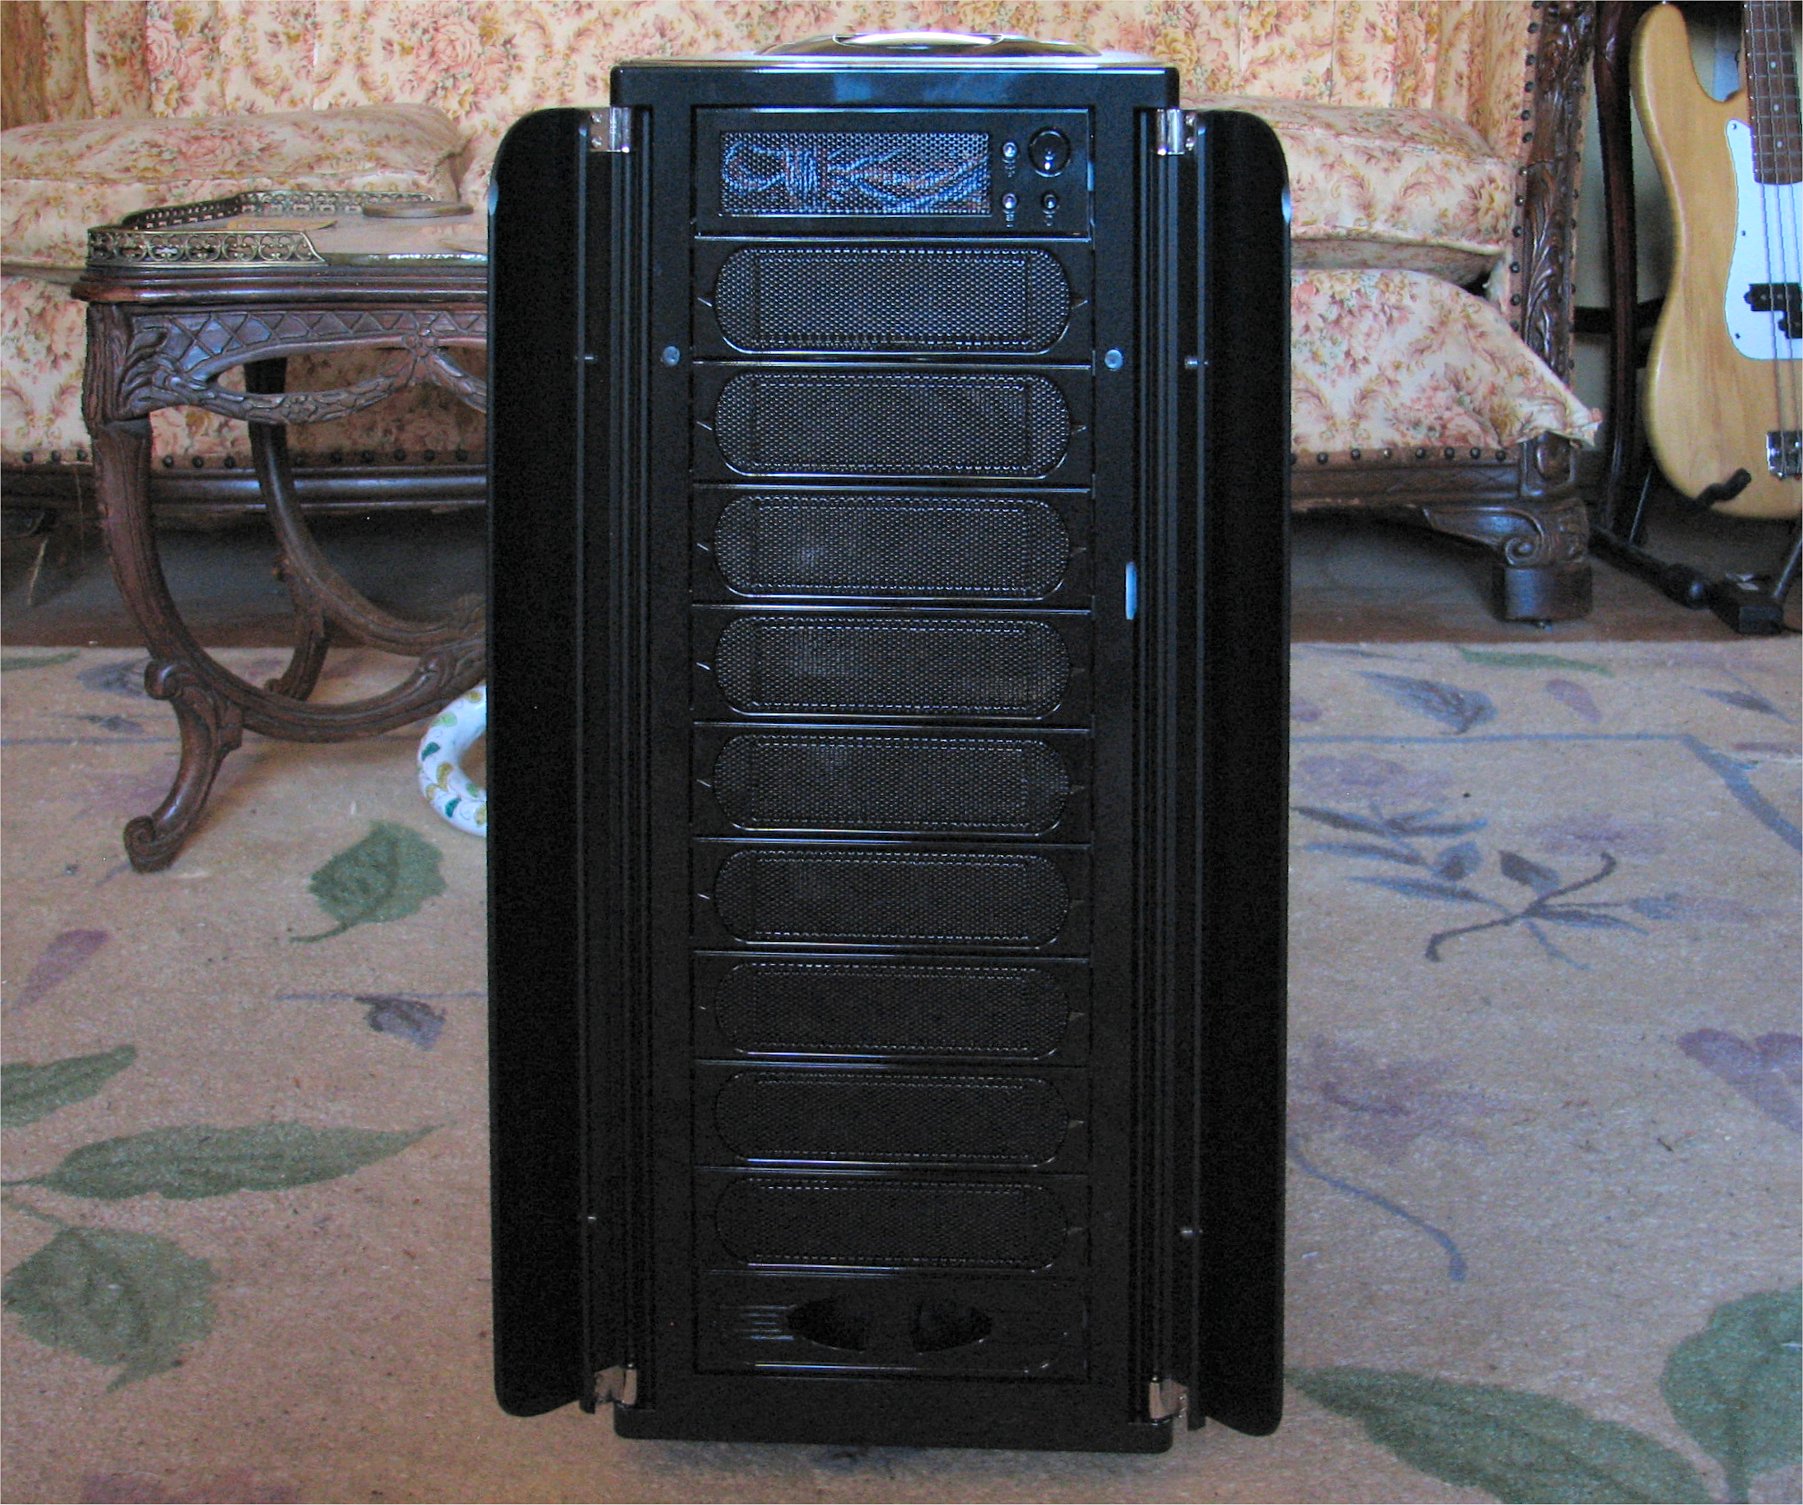
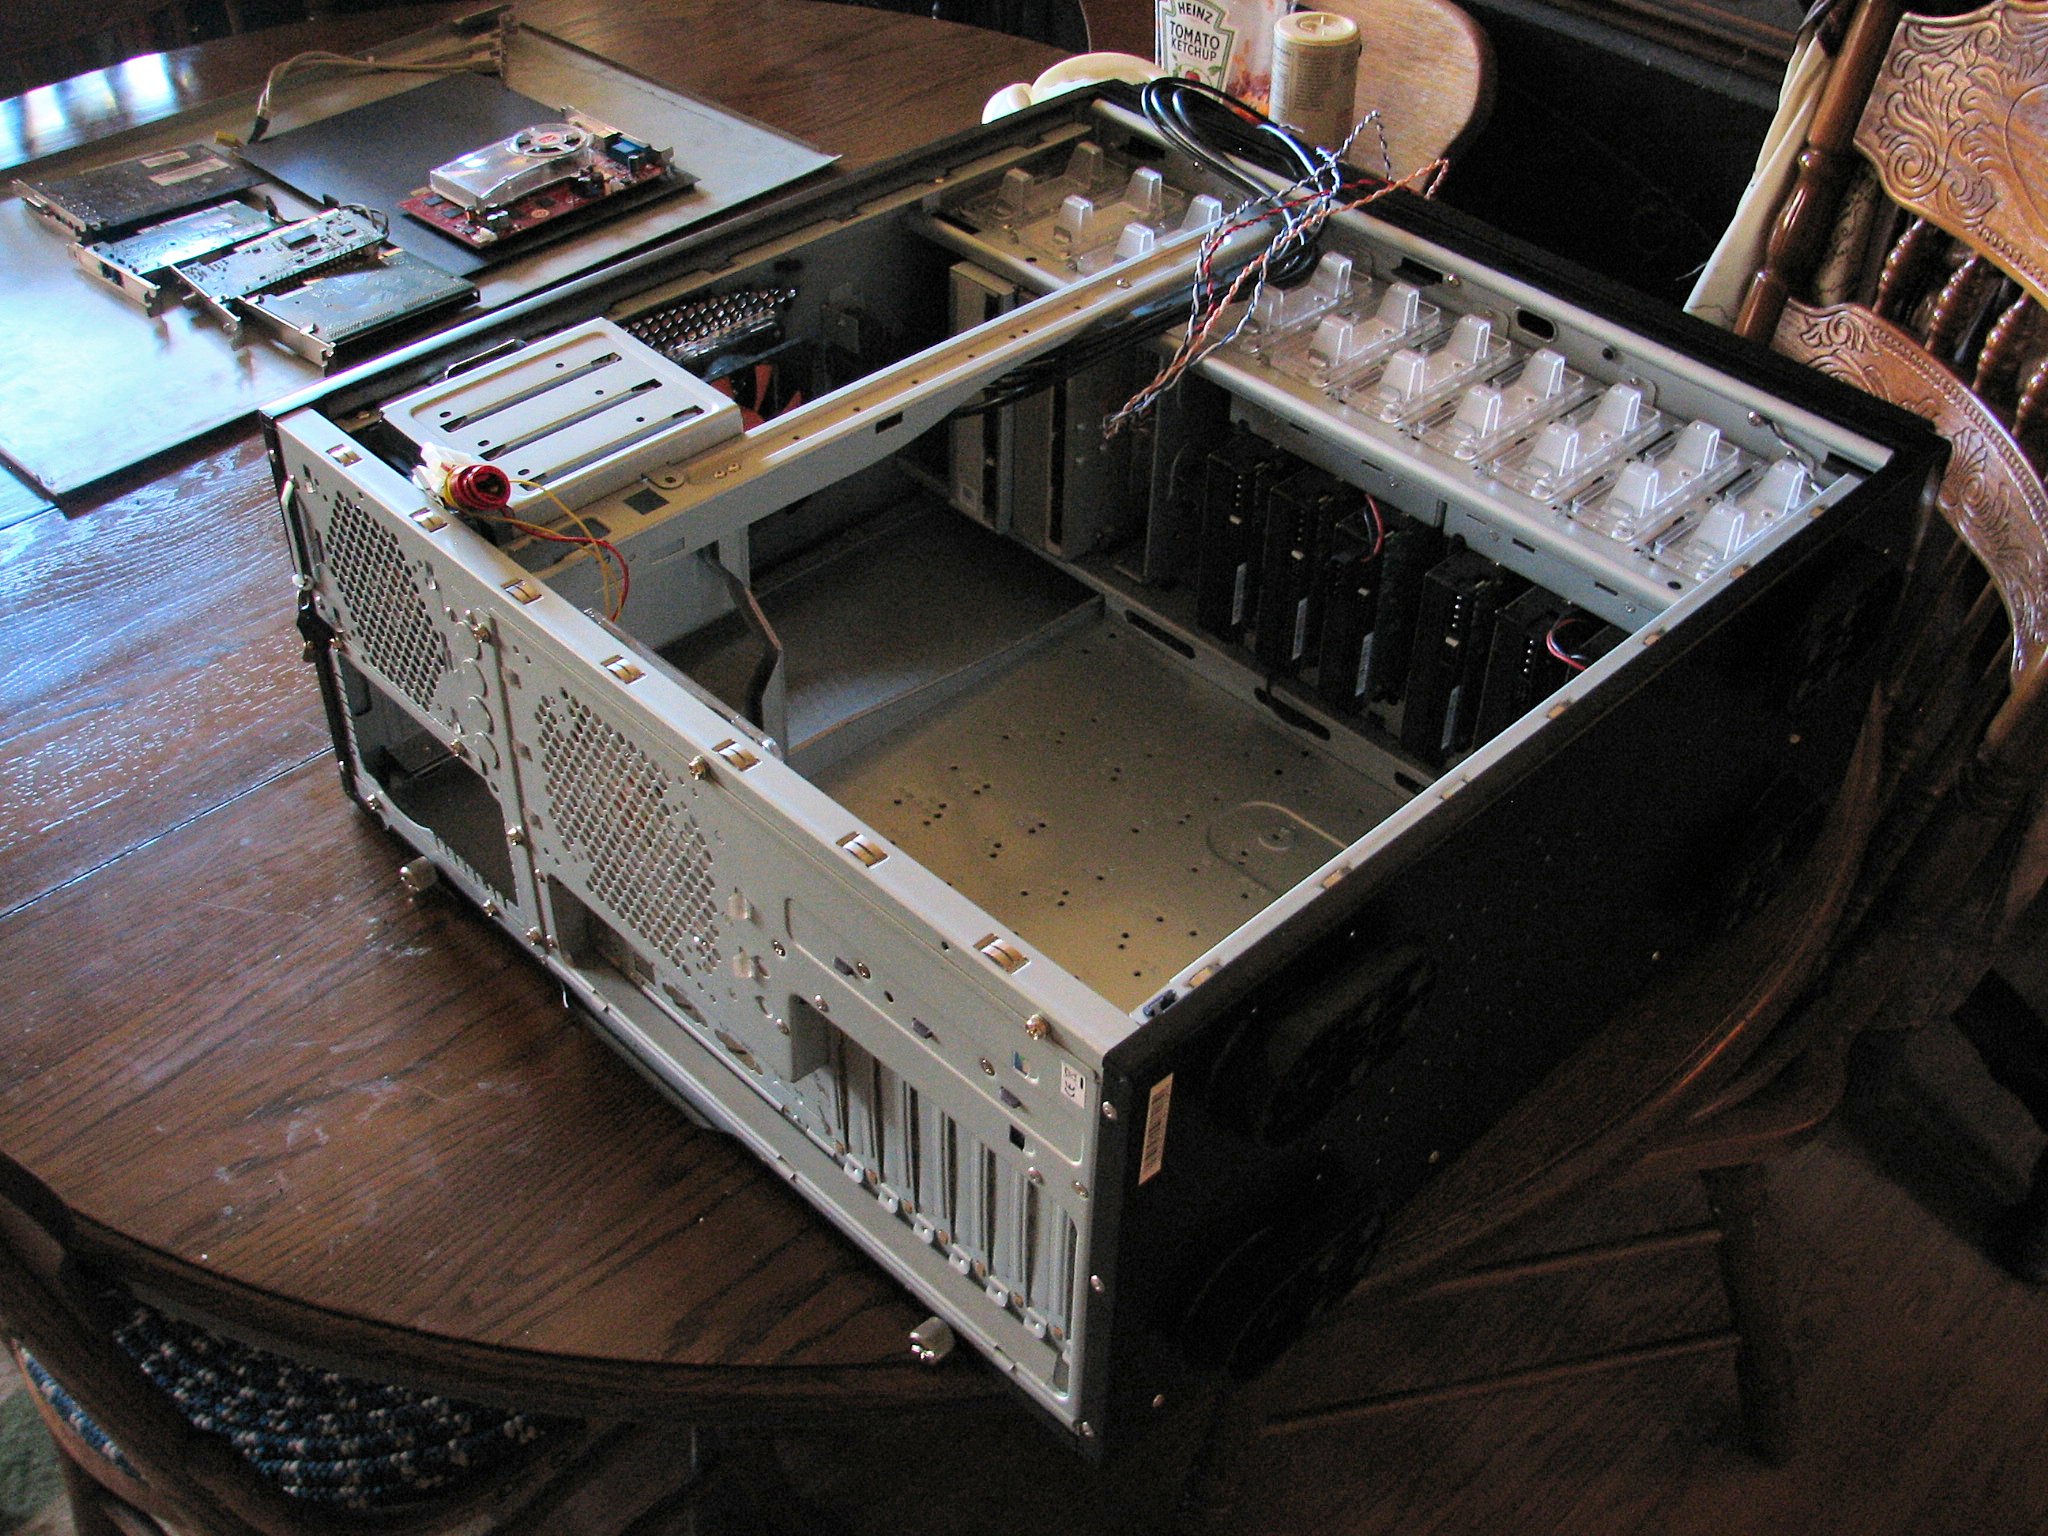
The Armor is a sight to behold, indeed. Engineering and construction are first rate. Style is top drawer. The swing out aluminium front bezal wings protect things that protrude beyond the drive bay covers like the knobs on the Live! drive. They also act as heat radiators to bleed the heat from the front frame where the hard drive fans are and they serve as compressors for these two 120mm intake fans. The hidden magnets hold them firmly closed but they still easily open wide to clear the burner drawers. The accessory storage drawer bay is nice and can be relocated to any bay in the tower. I chose to place it in the topmost bay. The power switch and FDD module can be placed in any bay. This was placed near the middle of the drive bay stack. All the various parts of this chassis are easily dissasembled, serviced and reassembled. Nice.
The Armor is not overly tall at only twenty inches, but it is much deeper than the average chassis at just over twnety-three inches with the wings closed. This is why it makes a great server, with the drive bays well clear of the motherboard area. However, you would be hard pressed to put this beast in a piece of prefab furniture. It is just too long. Also, since the 250mm fan draws inward from the side, there is not much clearance left to right in same said deskage. This monster needs to stand out in the open and be seen.
Although the case is roomy, it abounds of the typical razor edges found in well milled but not edge finished steel. The coating on the metalwork is beautiful but one needs to handle her like the classy lady she is as not to ding the paint job of spatter matte black.
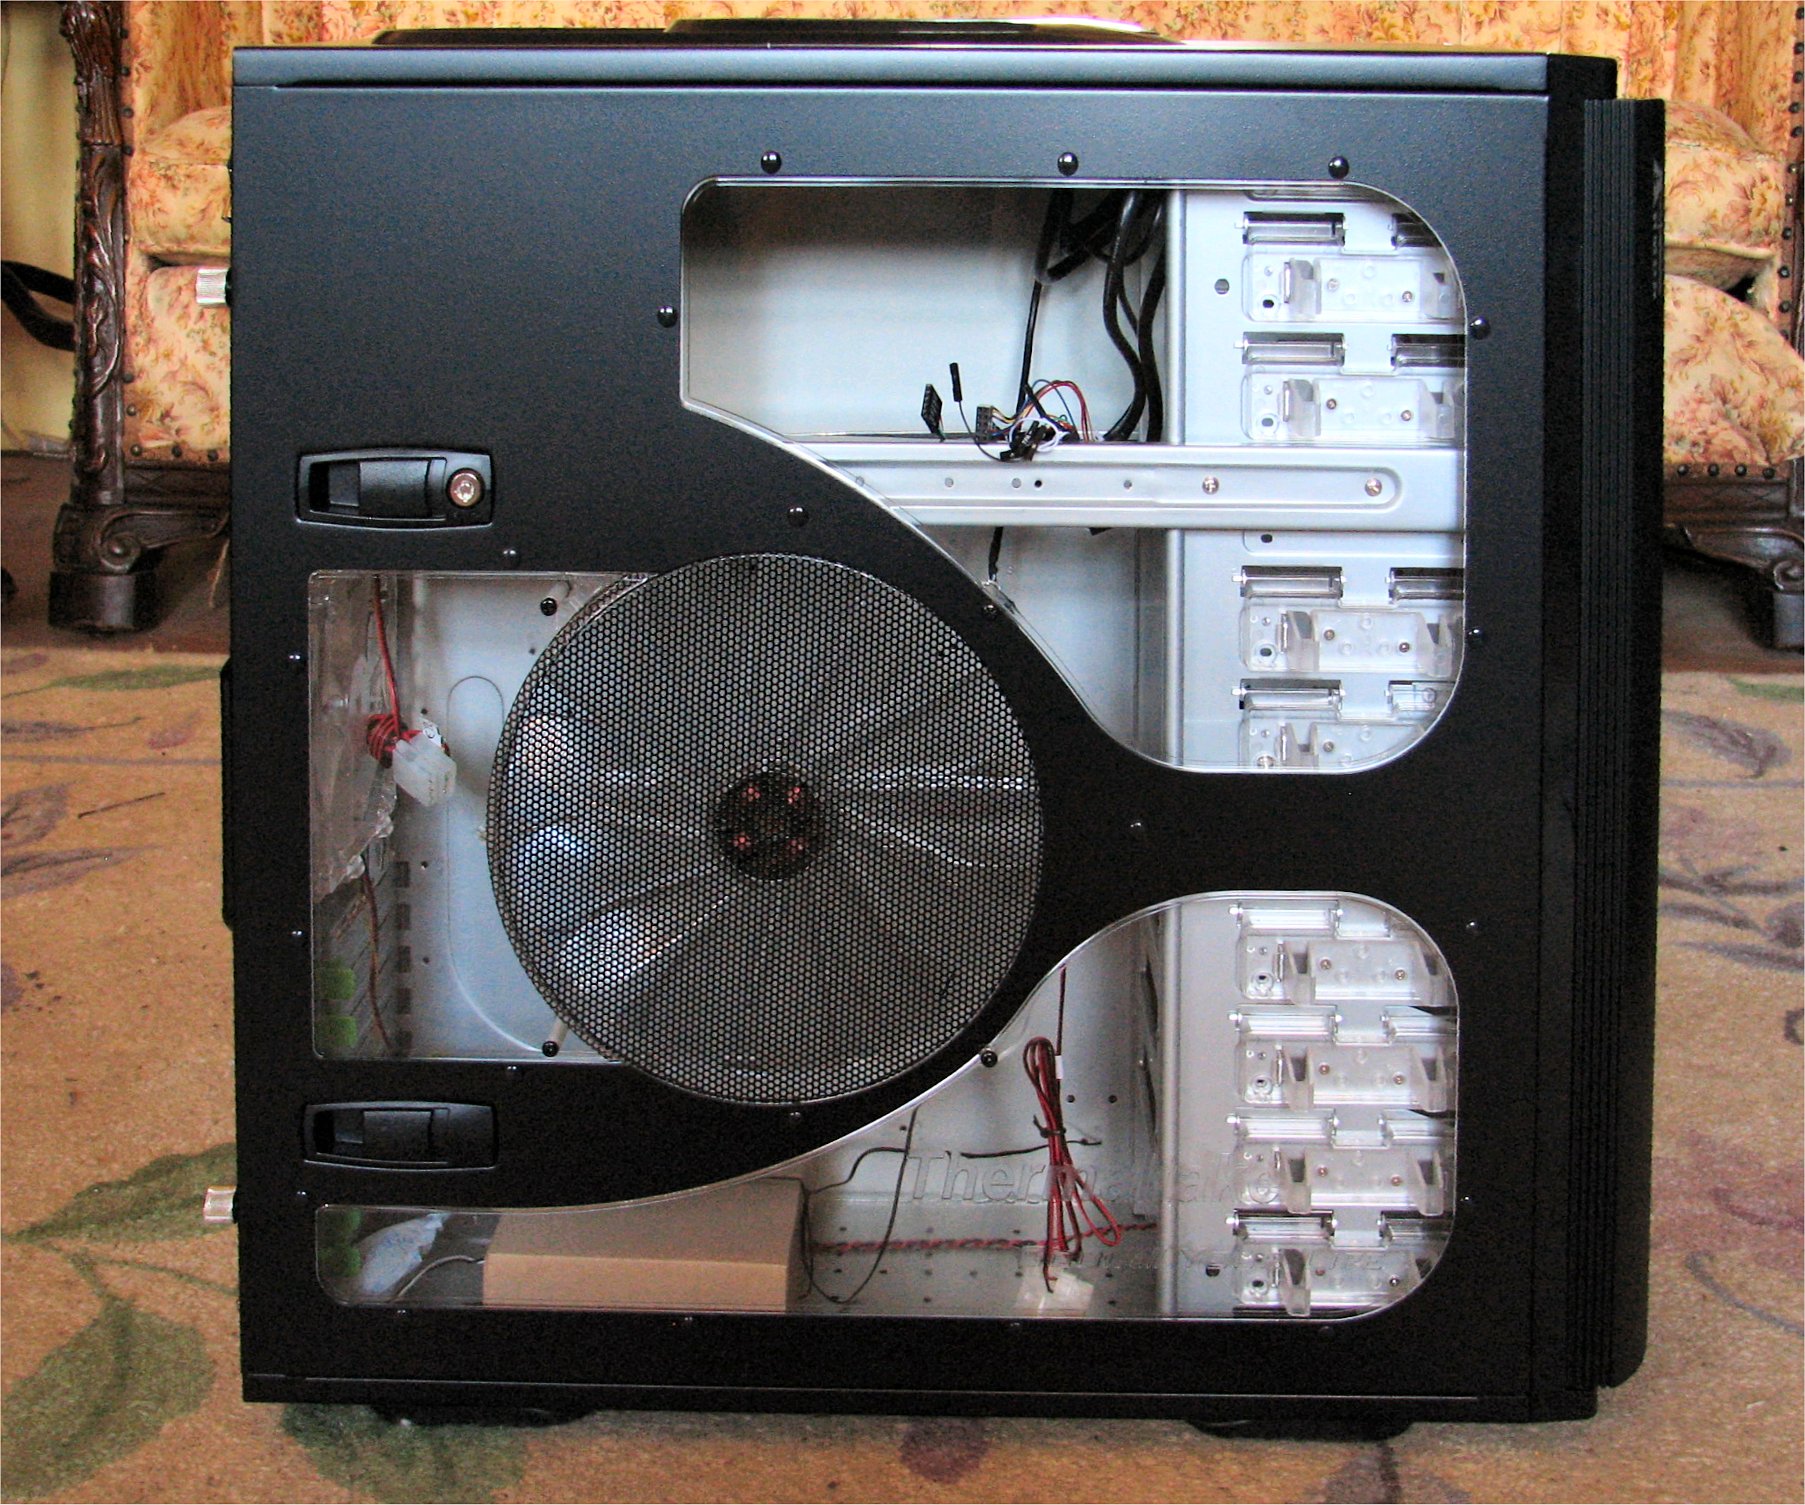
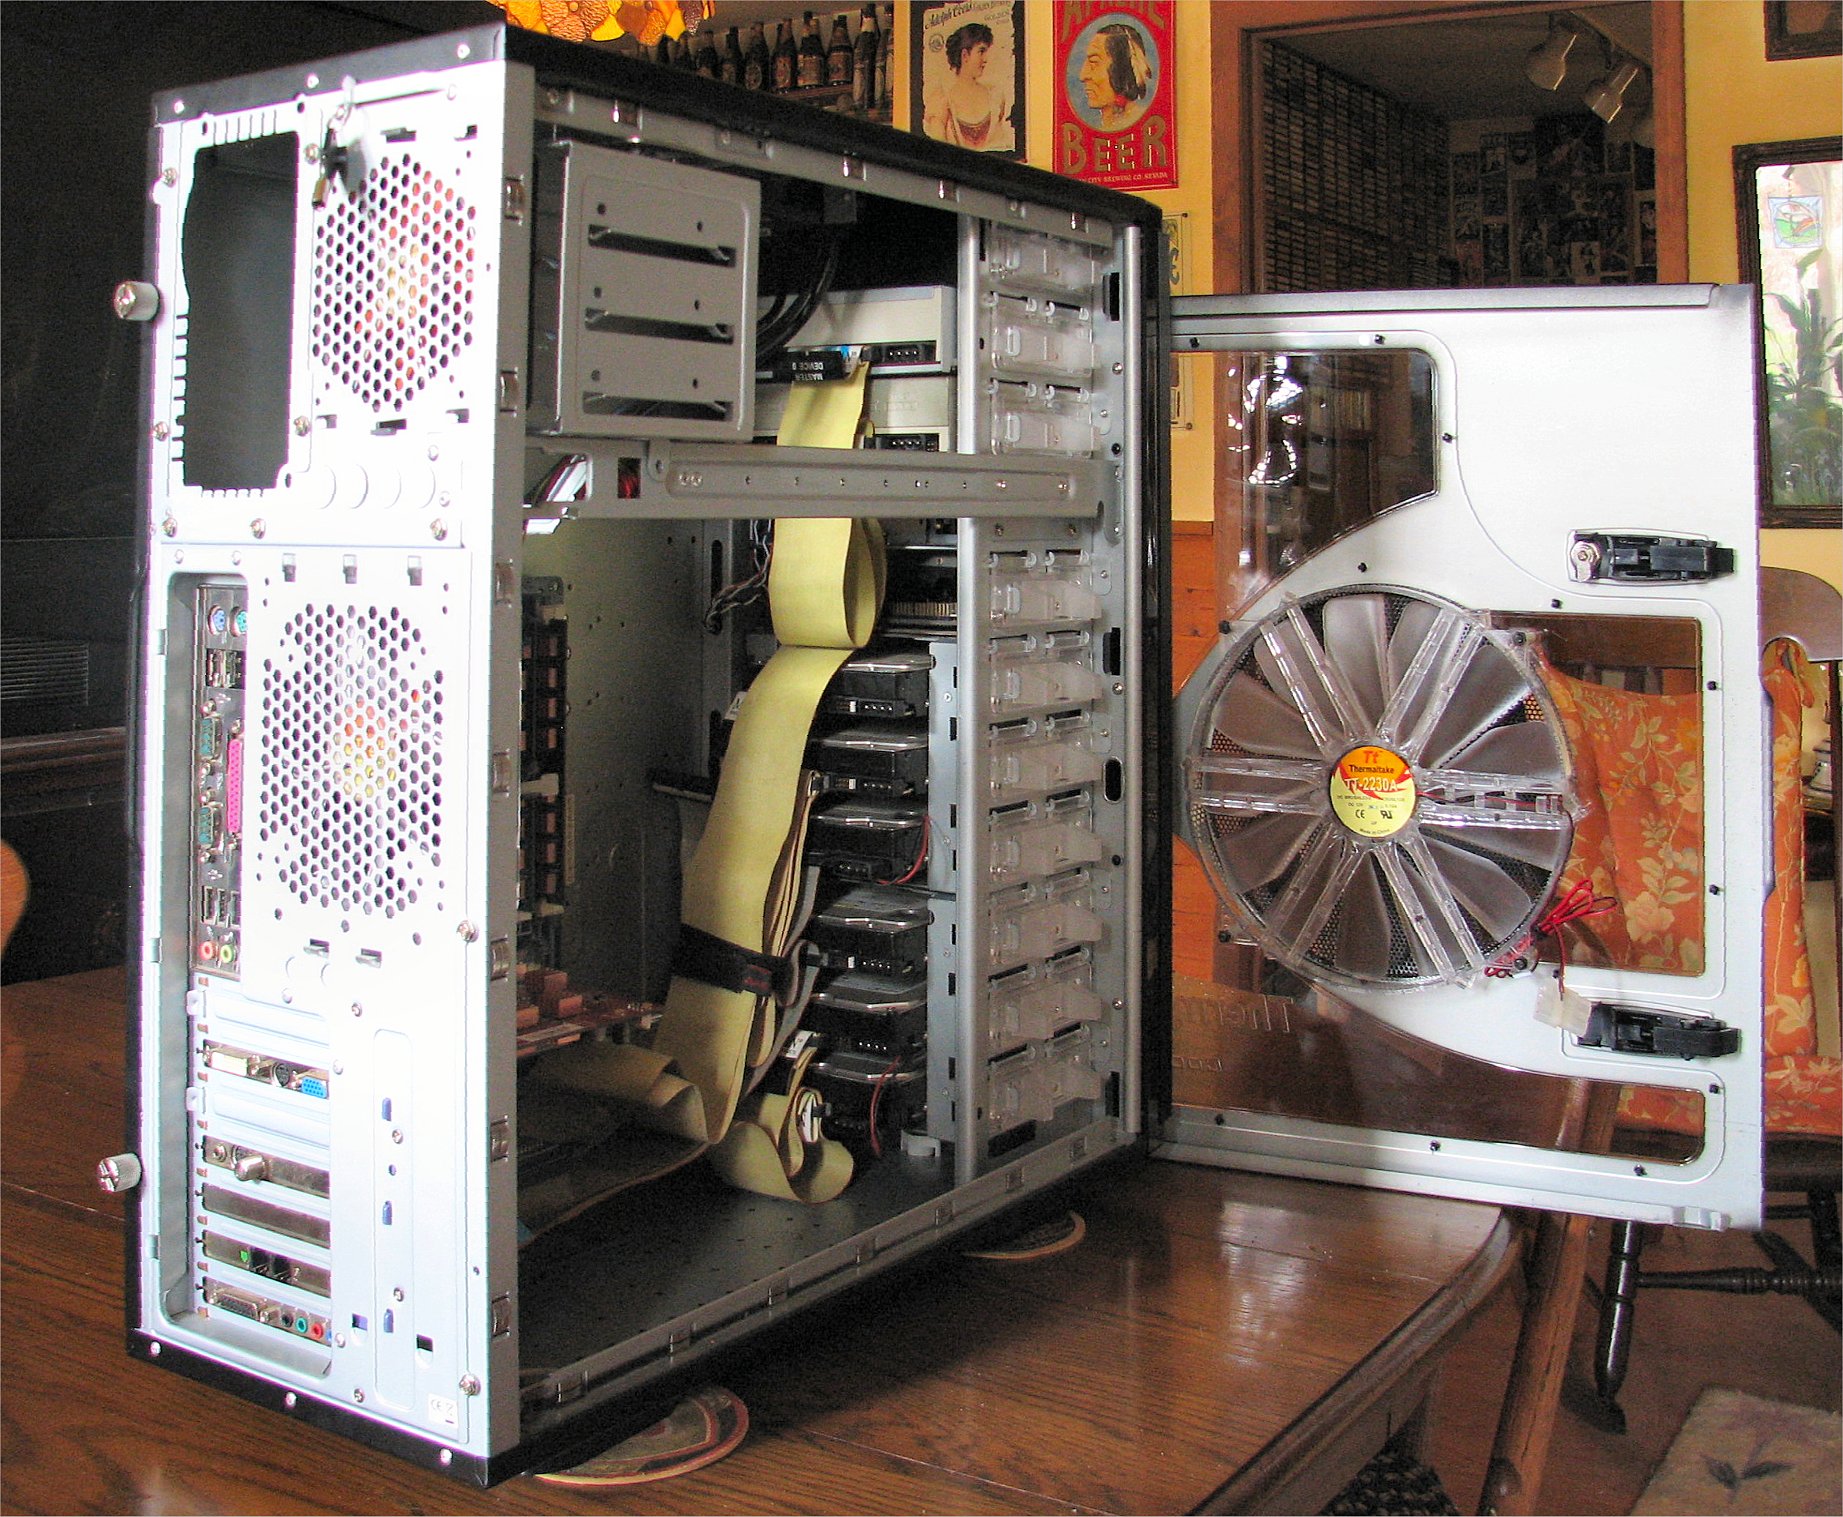
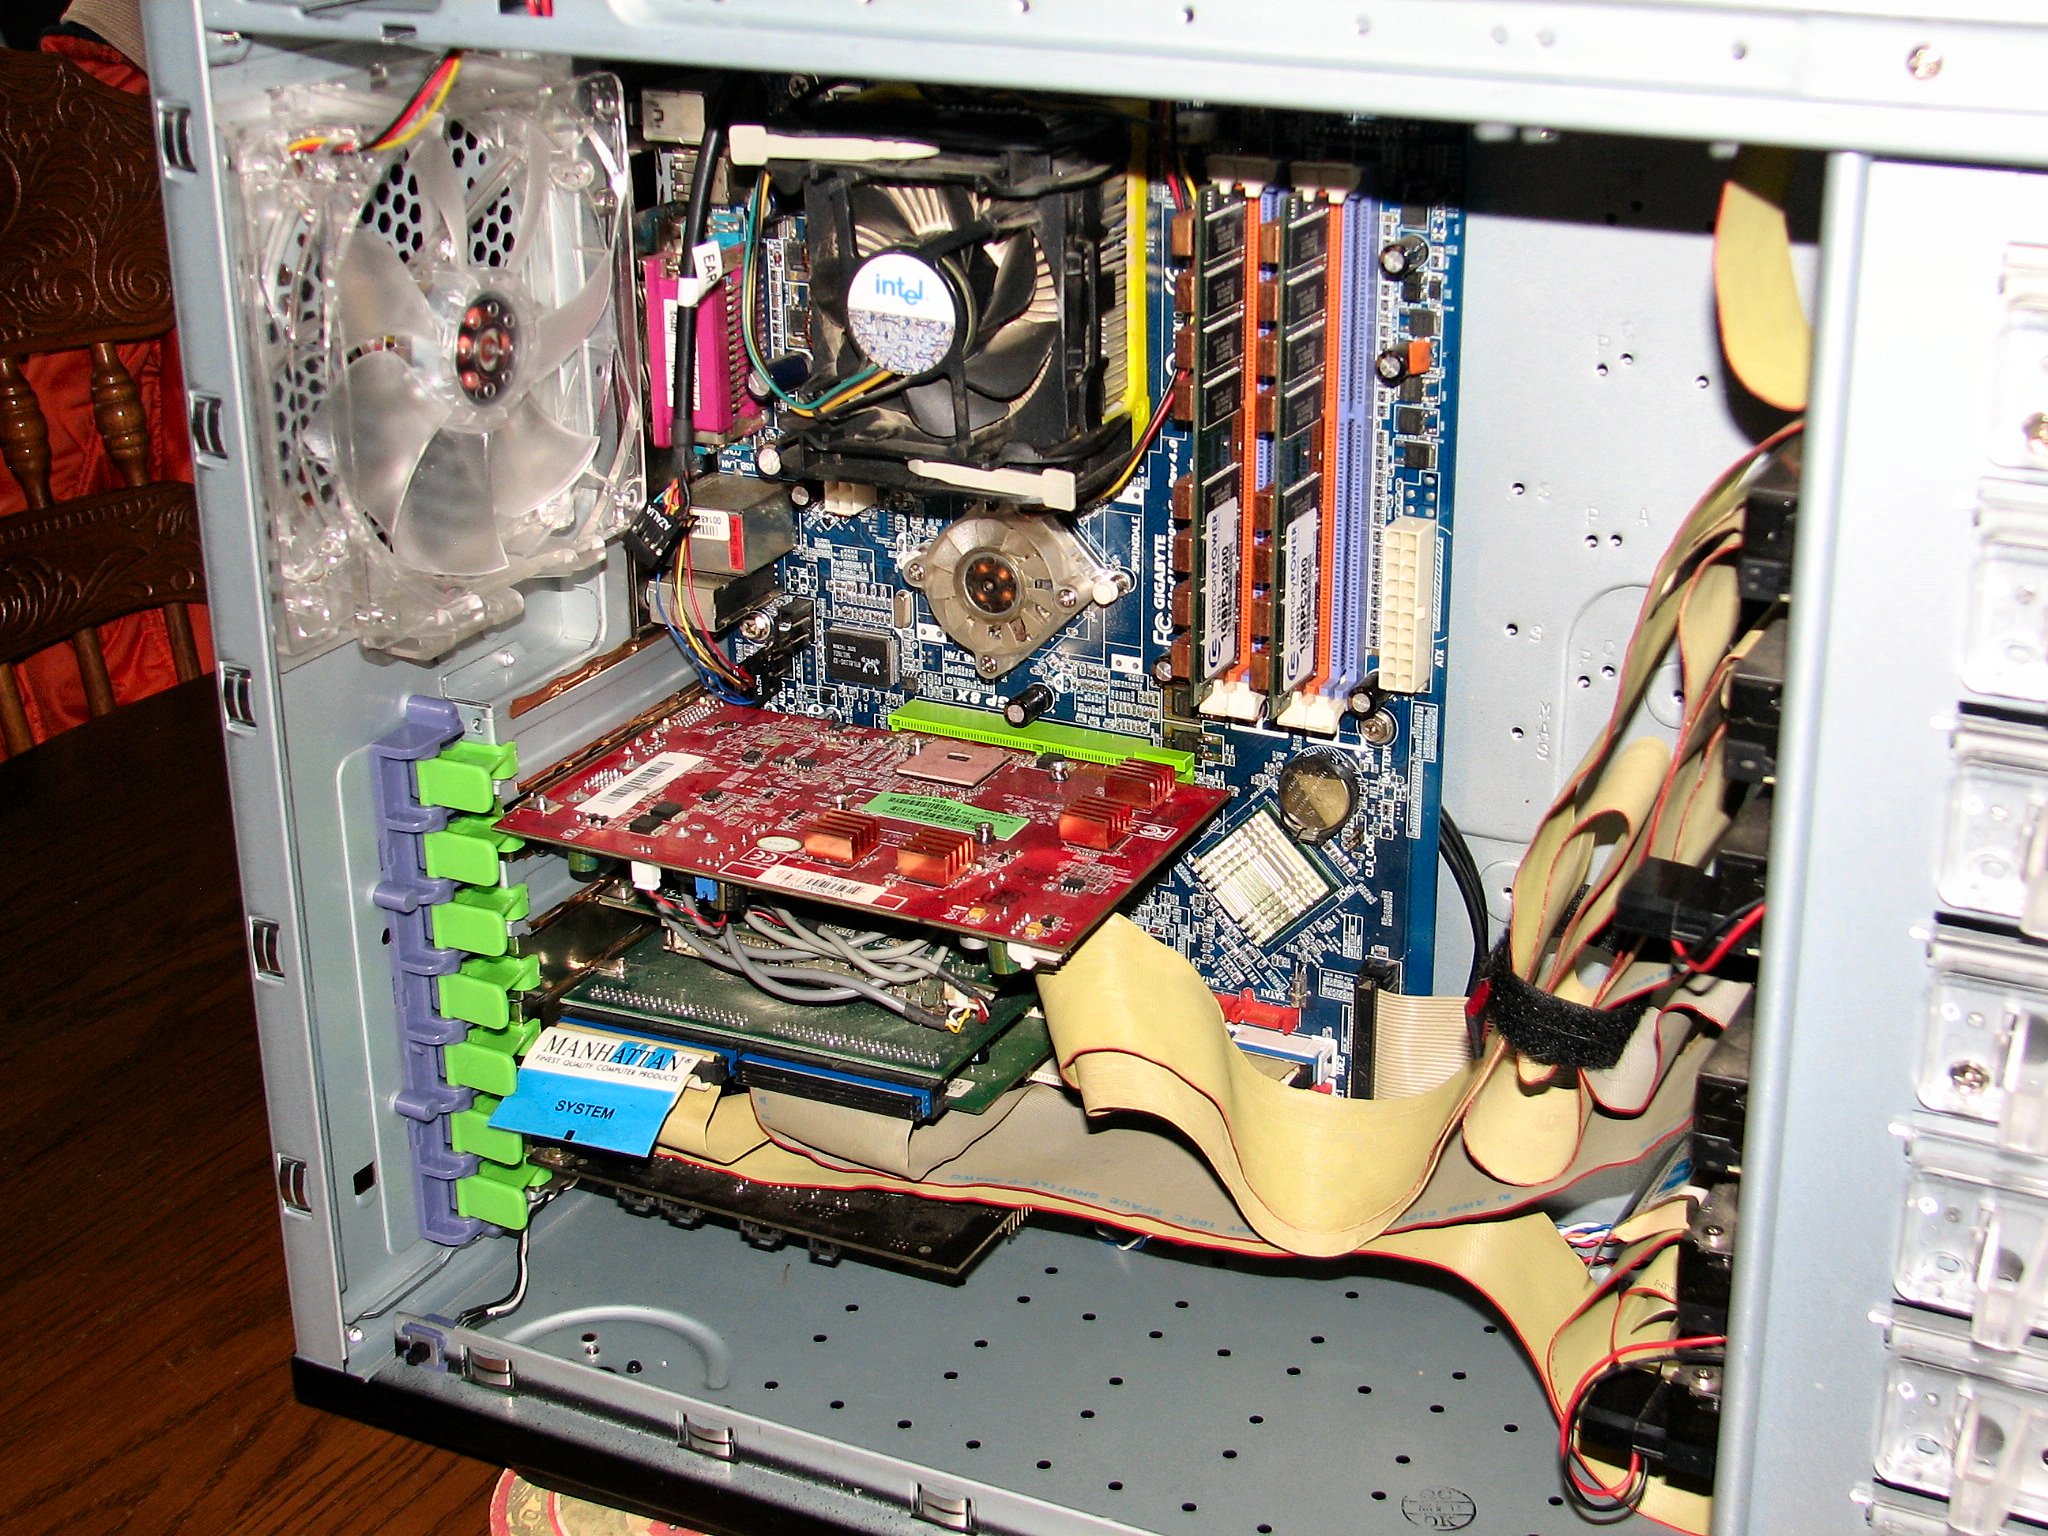
This "server turned gamer" case has that ever popular plexiglass side. It is stylish but held in place by plasic rivets. Though it is well made with a beaded trim detail around the edges of the three large metal panel cutouts, it is still a tad fragile. There are no damper washers anywhere on the case fan bolts. The large window allows total visablility of the system which is illuminated by the blue LEDs on the case fans. The tool free devices are great for test assembly. Final build will be done with screws.
The Armor is full of epic win where style and functionality are concerned. The box is deep and wide. It is designed well and easy to work in with enough space to house even the most demanding commercial workstation setup as well as being a great candidate for a small industrial data server installation. Being 1mm SECC steel, it is also quite heavy. By mounting the accessory drawer in the top bay, you gain a handle to pick the thing up by in front, grabbing the lip of the PCI bracket area in back as you lift. Do this with your legs, not your back. I found that attaching a fabric cargo strap around the case makes it much easier to move.
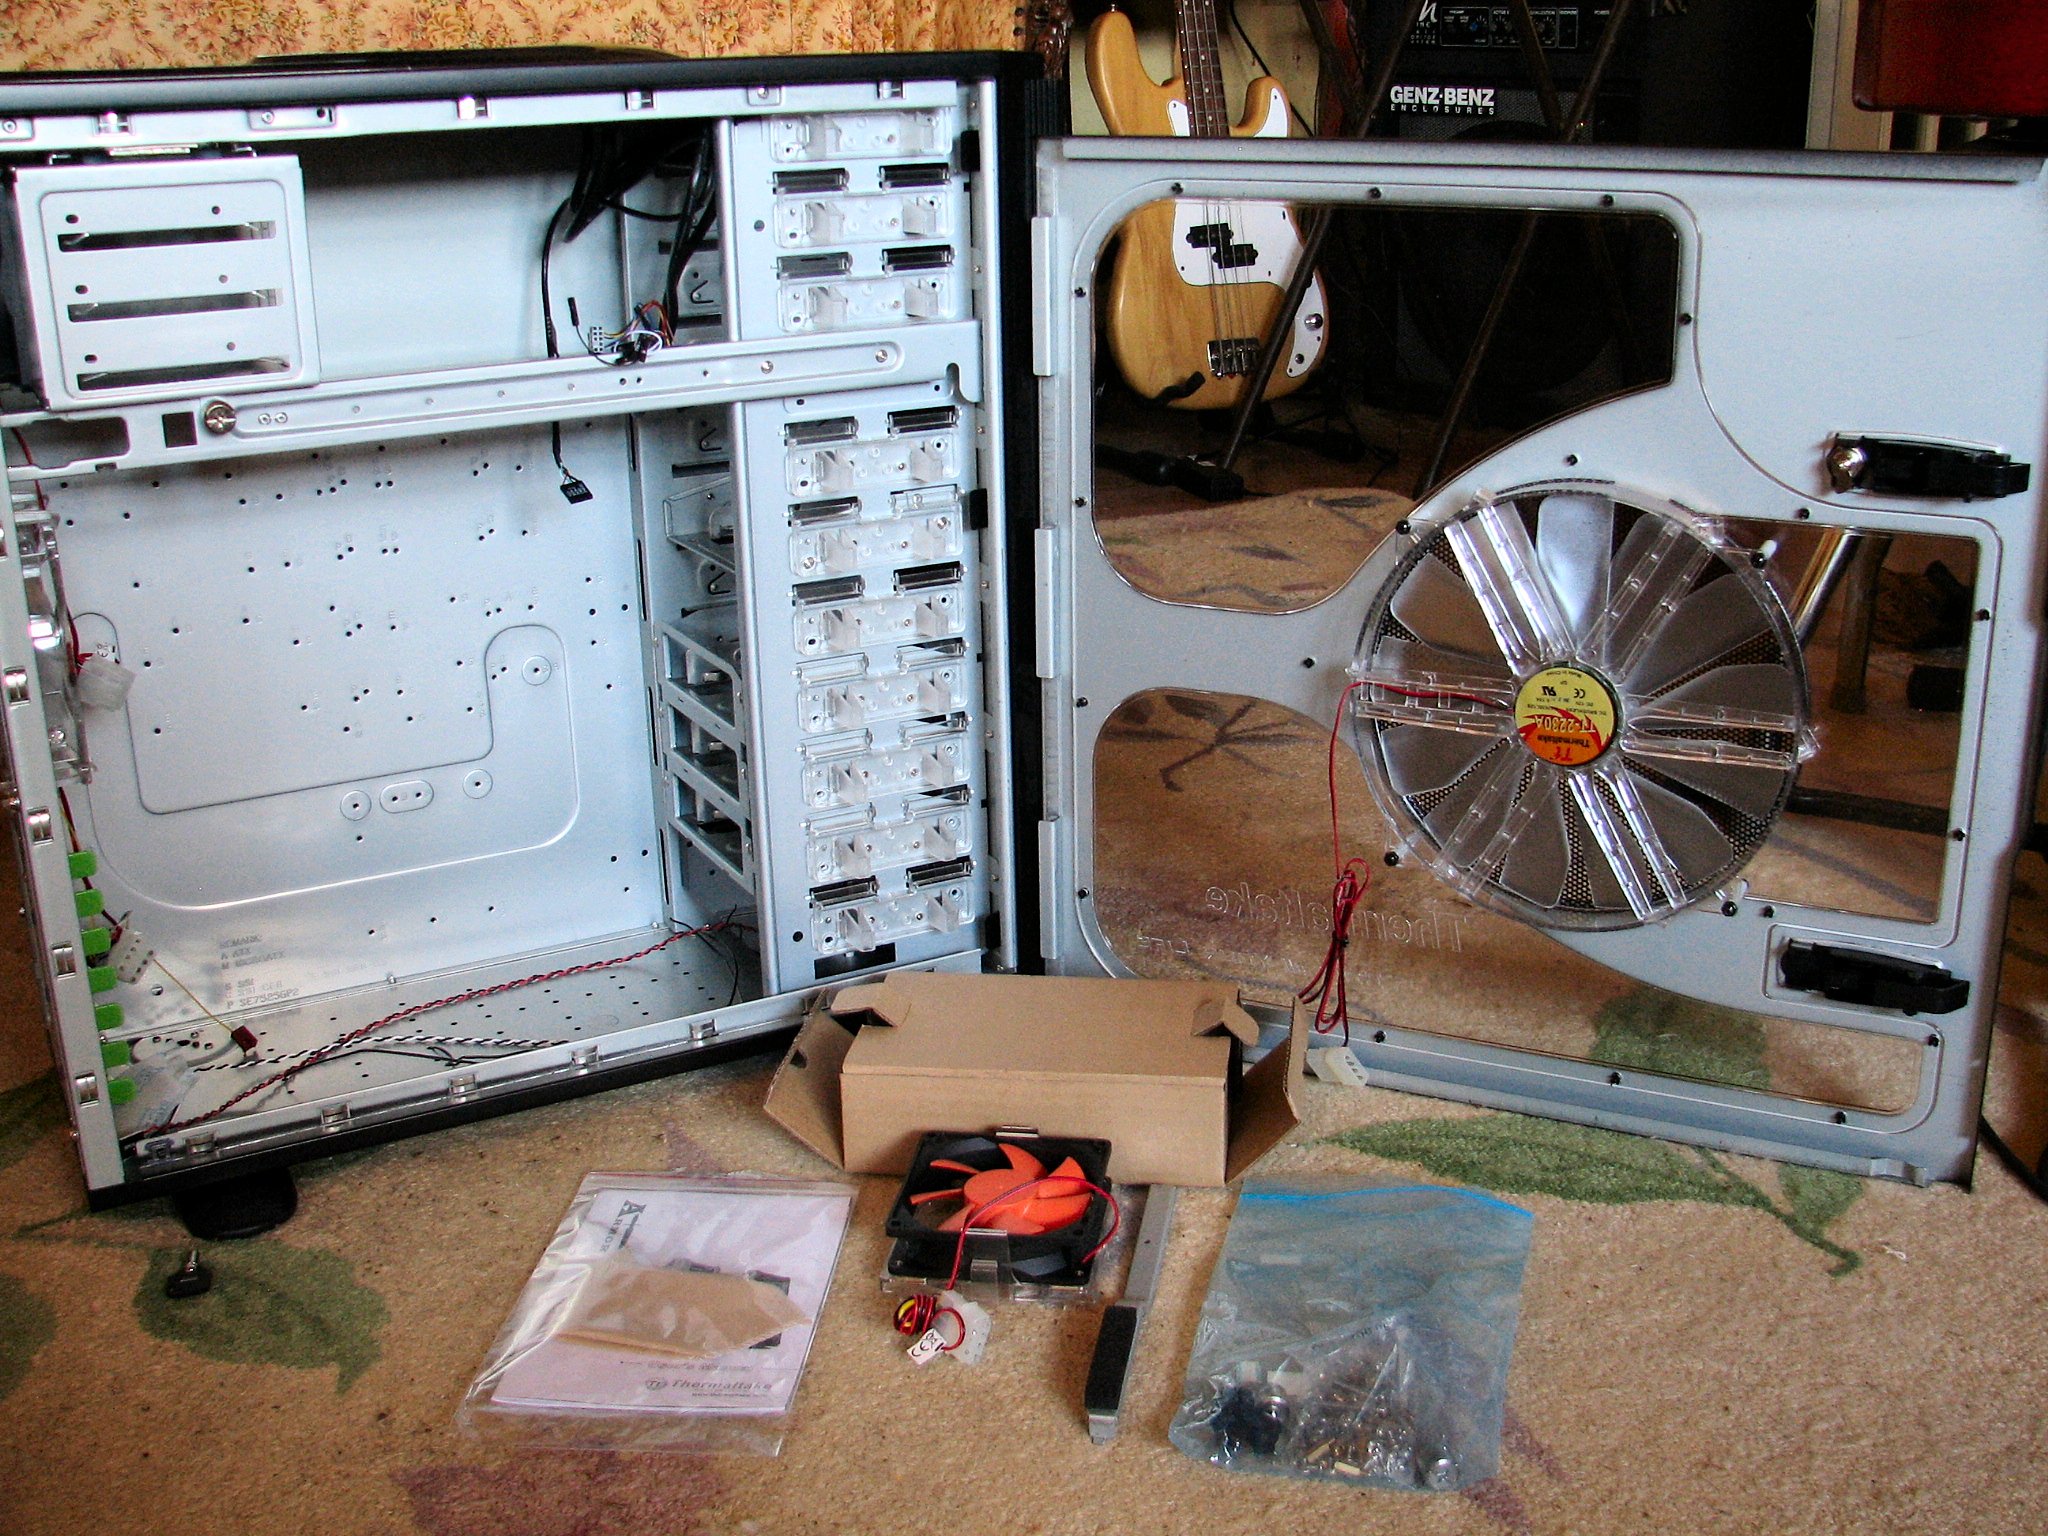
I would recommend this case to anyone who wants a good looking well cooled rig such as a front office server or recording workstation. This "house" has great "curb appeal" with its high tech looks, definately making folks say "Wow!" when they see it. Thermaltake does not disapoint. And Newegg delivered ahead of time. The whole purchase process was painless. Good job, folks. The Armor was carefully placed on four fiberboard coasters, service side up with the service side shroud removed, on the dining room table. Studs were set on the mobo tray and the mobo was fitted. The stock I/O panel was removed and replaced with the stock OEM mobo unit. All seven ground points were bolted down with stainless steel screws. Screws were added to the drive bay devices to shore them up and make the case more rigid while solidifying the chassis grounds to these devices. Each device only requires two screws per side, including the two Antec 900 drive cages, but as many fasteners as will fit shall be torqued in during the final build. The stock Tt front drive bay cage was removed to be installed in the machine I built for Erika, giving the three drives inside some much needed cooling with a 120mm blue LED fan. The Antec drive cages have blue LED illuminated 120mm 3-speed fans with switches set to Low.
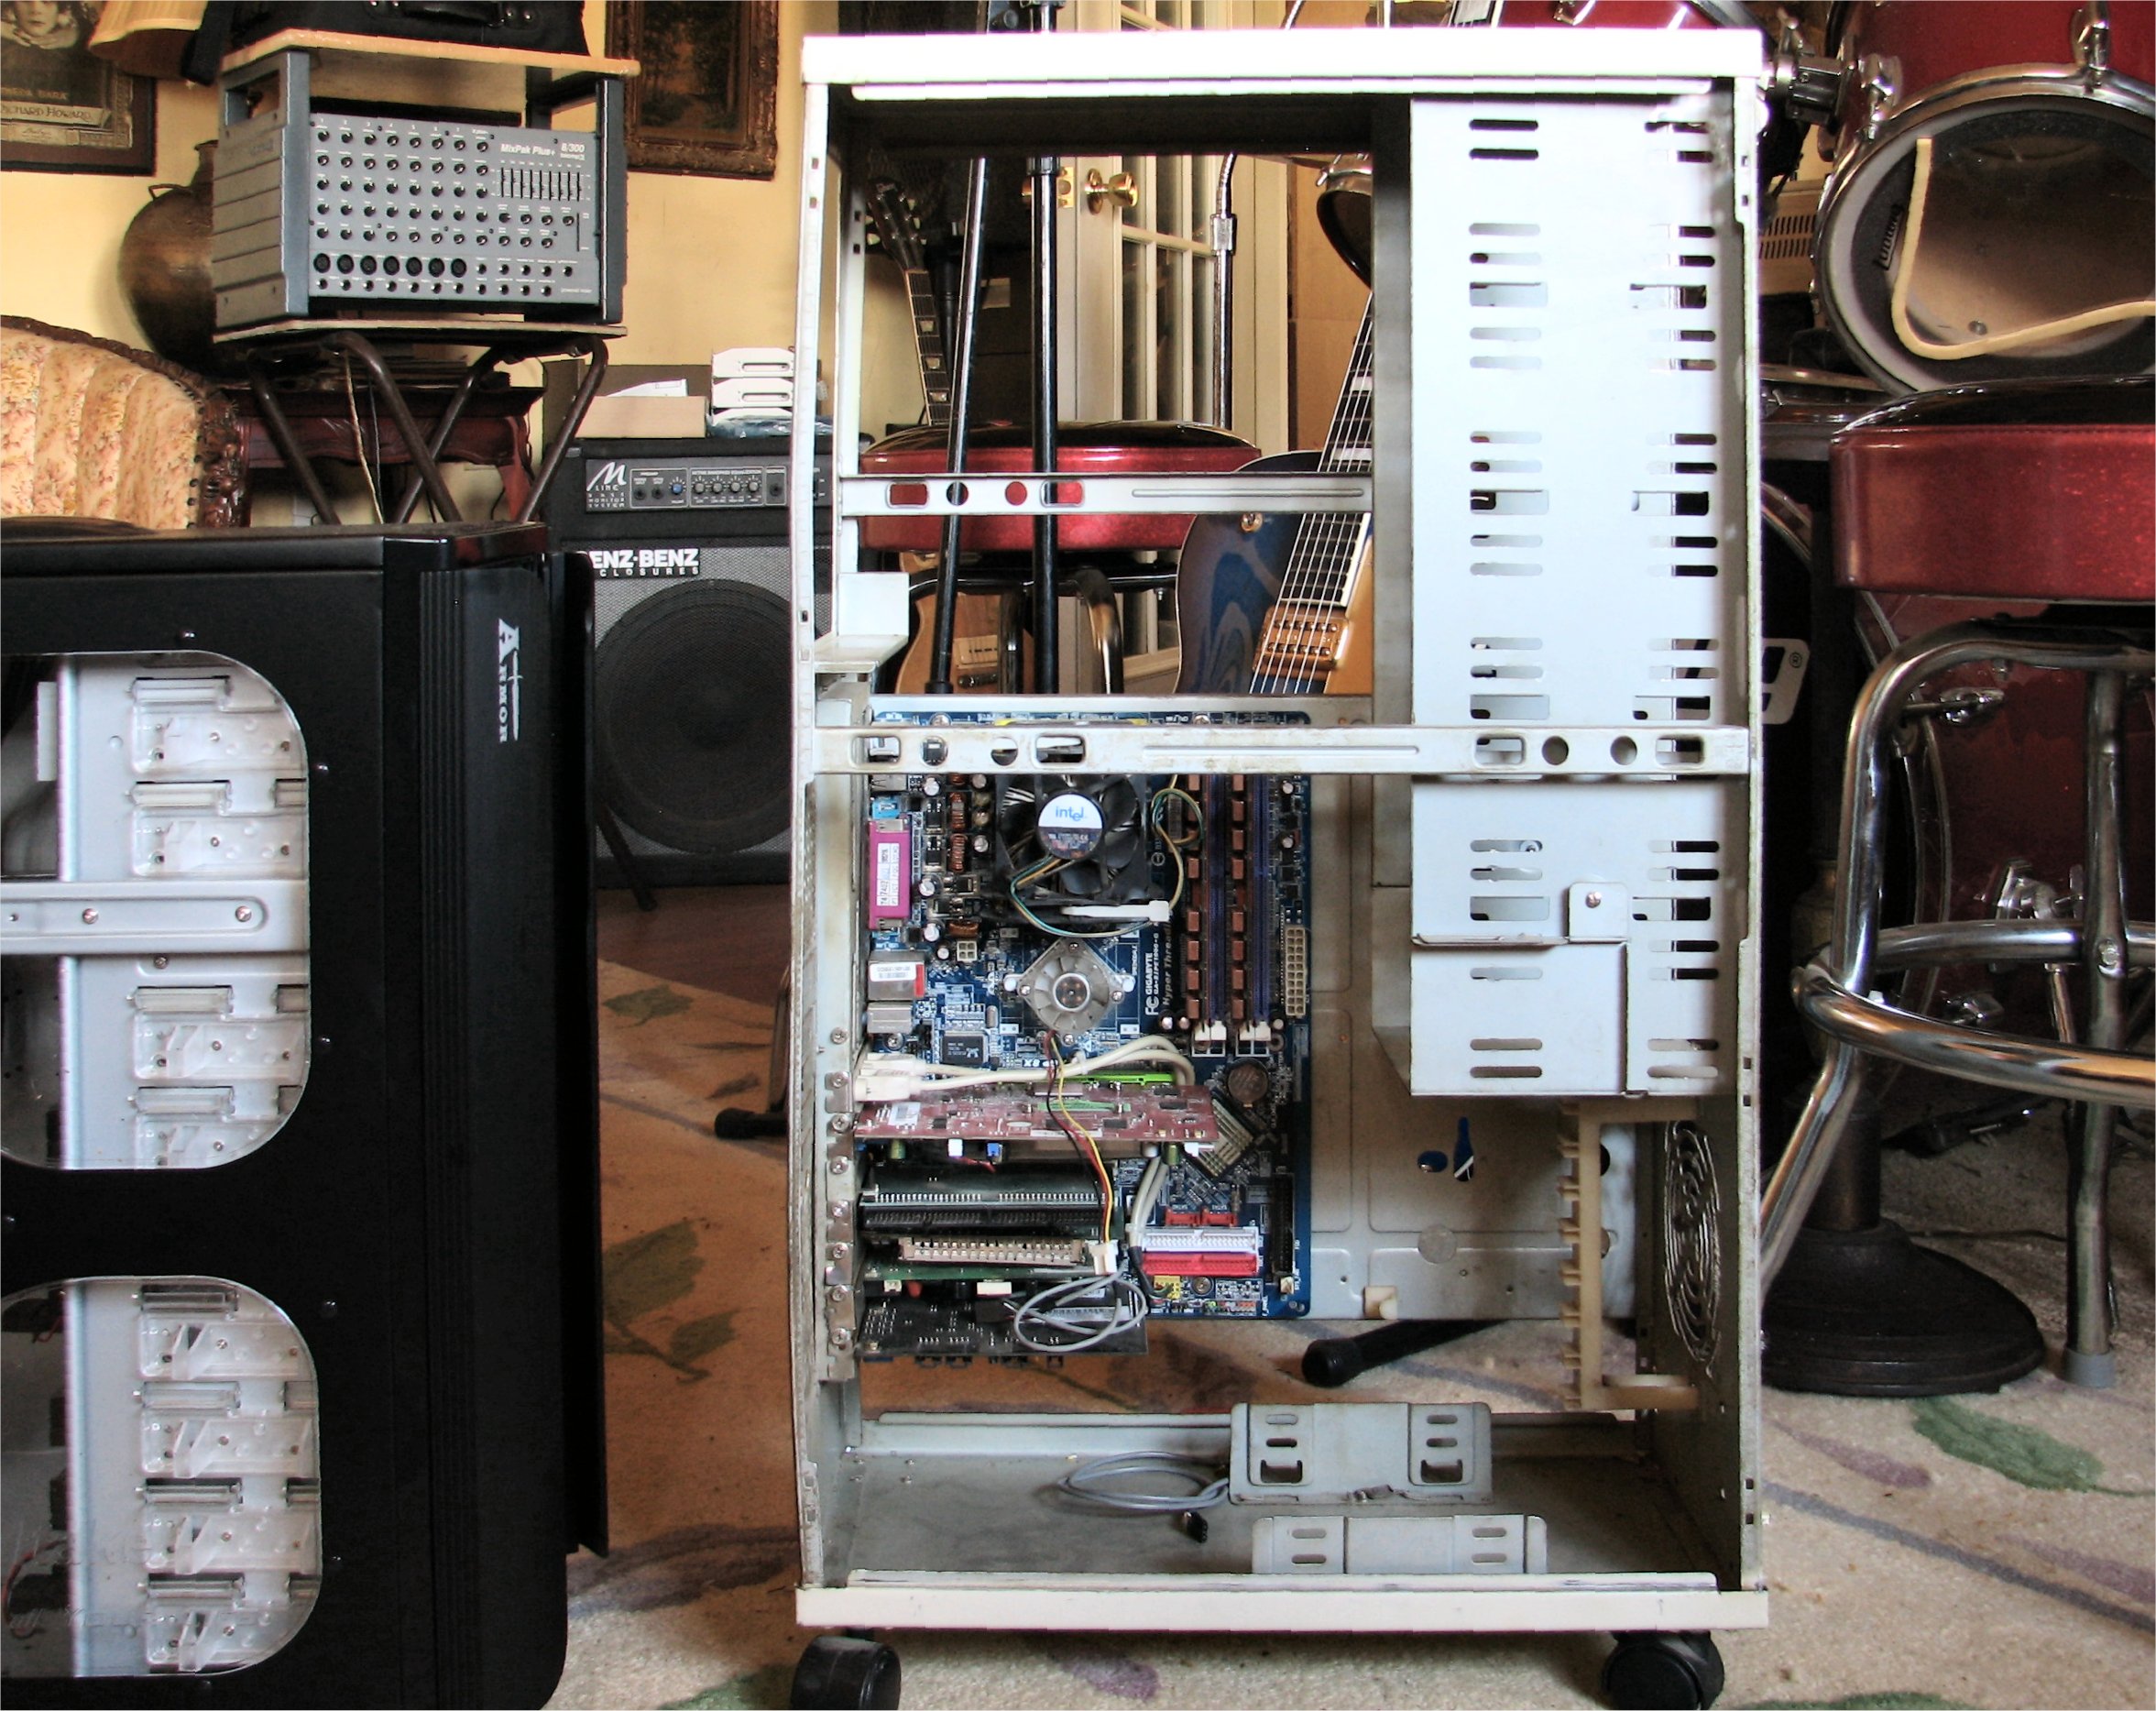
After the mobo was installed, I removed the PCI retention device. When all cards were socketed, this bracket was reinstalled. When the tabs were flipped down, all the cards were snug. This bracket is a novel concept but it makes removing the cards rather difficult due to minimal clearence between the tabs and the card to backplane brackets. Panel wires were easy to hide behind the mobo and snake through slots near the drive bays. All that remains to be done is install the two burners and PSU, along with a special 27-way flash card/floppy drive. I like the fact that one can quickly install drives or bolt them down.
During the early stages of the build, I encountered some dangerously sharp edges, common for a steel case. I was careful but still suffered some minor dings on my digits as I was removing the bay covers. The tool-free bay locks do not hold the drives in place tightly enough since they only make contact on one side of the bays. There are no attachment points on the other side if these are used alone. One can leave the mechanisms in place and add screws, which makes things extremely solid. The tool-free drive devices are like helping hands during the test build.
After installing six HDDs, the DVD burners, and all other drive bay items, the unit weighs about 55 pounds. Later when the mobo, PSU and all other items remaining are installed, I expect the contraption to scale to over 70 pounds! But then, it IS a super tower server.
The front (top) panel USB/Firewire/Audio jack plate lid will not stay open. It needs to have a mild sheet steel spring mounted underneath the hinge arms to keep it open when the lock is released after pushing down on the front edge of the lid. This jack plate really should have been on the front of the tower rather than on the top. However the unit would be taller as a result. I will use it only rarely, so this is not an issue. Though not a con, realize that this tower is deep from front to back, needing a minimum of twenty-three inches for the case, at least six inches of wall clearence to the back plane, and another three inches for the front drive bay wings to swing out, for a total of thirty-two inches. I recommend a full three feet from the wall to the front edge of the furniture and at leat a foot or more of side to side space for case ventilation.
Because the Thermalteke Armor case has great front to back depth and a relatively low height, there is perfect airflow, as everything inside has space to breath. Since the case is longer than it is tall, the weight is distributed low and the case sits stable on the floor. It is too heavy to place on a standard computer desk table top. Installing gear is easy and everything fits together nicely. One must choose a PSU that fits the relatively confined space at the top of the chassis. A 3.5-inch hard drive cage sits where most modern PSUs have their 120mm exhaust fan located. Because of this design, a PSU that vented out the back plane using an 80mm fan was needed. Only one company makes such a beast, PC Power and Cooling. We chose their Silencer 750 Quad Blue 750-watt ATX PSU, which fits as if taylor made for the case and has power to spare. The case finish is a heavy industrial style black spatter matte paint, not the typical glossy piano black surface that adorns most pimped out boxes. The four big stabalizer feet are sturdy and lock into their various positions. With these feet rotated to 90 degrees, the case is impossible to tip over. This is good if you have toddlers who like to pull up on things. There are small rubber pads on the feet to keep them from marring the floor.
The side window is big enough to see everything inside. It is well reinforced with metal separators and the support structure of that enormous 250mm service side fan adds a tank-like rigidity to the service side panel. There are enough nooks and crannies in the chassis to make hiding wires easy while still being a cinch to clean. The service side panel locks in place and does not need thumbscrews, which went to the tray side panel instead.
The test build is now complete. All that remains is raising the money for the PSU and DVD burners along with any other small items like adapters, gaskets, thumbscrews, etc. Total cost of the rebuilding is extimated to be around five hundred dollars. We decided to break up that cost in two shipments. The case shipped in March at around 250 bucks and the remainder will be spent on the other items to be shipped in April. Stay tuned for Part Two of this story in the next issue of the Gazette as we continue the construction of this corporate workhorse and bring her online...
The figures below represent the approximate daily hit count for the site since going online on April 2nd of 2004. Counter checks begin around ten in the morning and end around ten in the evening, Pacific Daylight Savings Time. Currently, that total stands at over 78,050 happy campers in the Land of the King!
Second Relocation Fund DriveThe Second Relocation Fund Drive is much more ambitious than the first since the distance is greater and there is the matter of shipping equipment and belongings overseas to Åkersberga, Sweden. The conputers along with a collection of optical media, mics, recorders, cameras and a reference speaker system are worth thousands. The systems can be switched to 240VAC@50Hz via toggles on the power supplies, so adapters will be all that are needed to get them plugged into the local power grid. We are going to have to raise a lot of money to pull this off, there is no doubt. Airfare alone for a one-way ticket bought in advance will be between $1,000 to $1,700. Passports and Permits will cost around $200. Shipping equipment could be incredibly expensive, perhaps over $2,000, bringing the total cost of the move to a conservatively estimated minumum of $4,000. If a return to the US to await permanent residency is needed, the cost could be even higher.
How To Make A DonationAs before, the original Pay Pal account which Doc and Tom Hoehn created is still active. Here, you can make your donation to help us relocate Walnut Hill Productions to Sweden. The Second Relocation Fund Drive will run all the way to the time Doc actually arrives and is settled in with Erika. He will be joining her upon his arrival, and she will already have the beginnings of a home started by then. She is to begin this process around April of 2009.
You can also send checks via standard mail to the following address, should you choose to not use the Pay Pal account. Please make checks payable to Richard Mogridge, with the words "Relocation Fund" in the memo line. The address is:
If you have questions about the relocation fund, you can call the Bone Doctor at the Walnut Hill Office of Operations to learn more. That telephone number is 1-727-230-2610. Become a part of history by making your donation today. Please help us to continue the work we are doing as we steadily grow and evolve, adding new features and more services such as broadcasting audio and video for all to enjoy. You'll be glad you did, knowing you will be helping to keep the King of Instruments in the public eye so that it will not be lost to future generations. You can also become a part of this growing team of hard working Theatre Pipe Organ enthusiasts. We need the help of all those who can send in pictures, documents and recordings as audio and video clips for use in future featured organ and artist articles. Get your name in lights on our site. Call the Walnut Hill Office of Operations to learn more and get started.
Funds received during the Second Fund Drive: $645.00
All contributors will get recognized at the site should they choose, or they can remain anonymous, simply by letting the Bone Doctor know their preferences via email. Below is a listing of those individuals who have generously contributed funds and items to date:
These most kind and generous folks have earned memberships in the Walnut Hill Organ Club and will be notified of their membership status when the club goes official after the move to Sweden. We have decided to push forward with the organization while awaiting an ATOS charter. We will post our progress in the Gazette during the fledgeling phase of this project which must still undergo much planning. This is yet another major move forward for Walnut Hill Productions, one of the fastest growing and most visited TPO sites on the internet. We are trying to keep the Walnut Hill Productions website a free place for all who love the Mighty King of Instruments. We are also trying to keep it vibrant and ever changing. We do this to preserve a very important slice of history, but we need your help to keep it going. This move will allow Walnut Hill Productions to continue making major strides forward for the King of Instruments, doing the same thing for the organs of Europe that was done for those in the United States. We are thanking you in advance. The best is yet to come!
Save The Mighty WurliTzer and Grande Barton
|
|||||||
EDITORIAL ARTICLES |
|||||||
|
|


ADVERTISEMENTS |
|

|
|

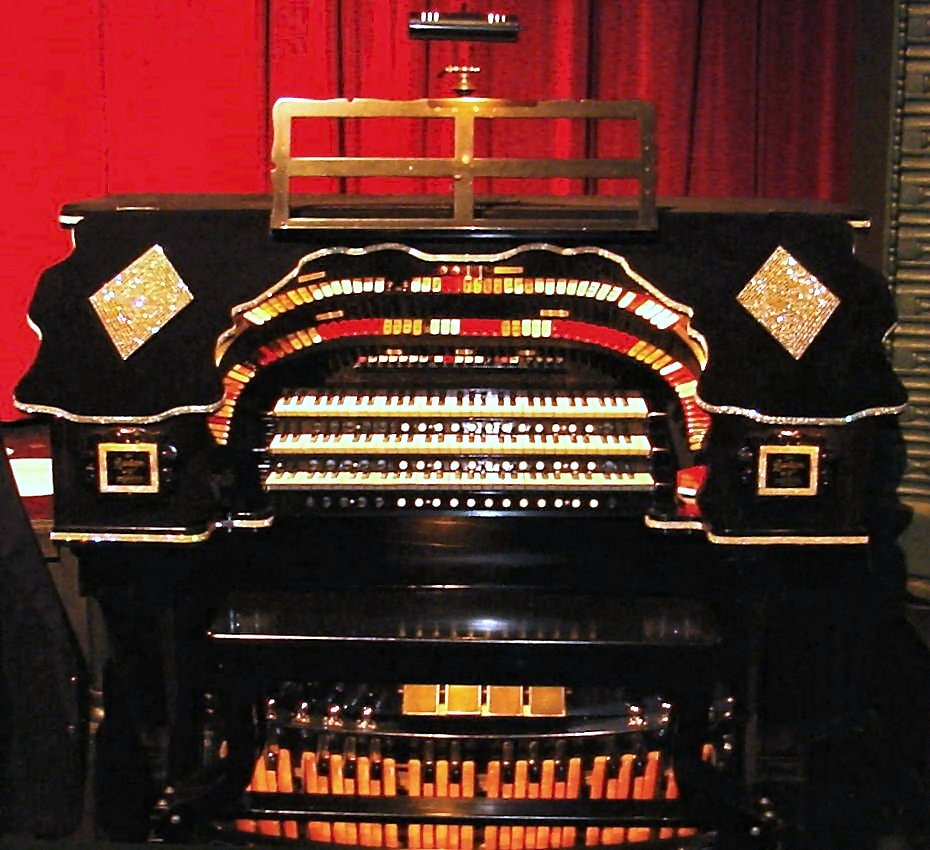
Mighty MidiTzer Style 216
|
|
|
Download MidiTzer Version 0.881 Did you ever imagine you could put a Theatre Pipe Organ inside your computer? Well, now you can, with the Mighty MidiTzer by Jim Henry and Crew Glazjev. Best of all, it is absolutely free! Just click the picture to the left to get started on your way to playing the Style 216 2/10 Mighty WurliTzer Theatre Pipe Organ virtually every day! Listen to the Mighty MidiTzer! Below are some cuts from various Featured Artists here at Walnut Hill that will give you an idea of what the Mighty MidiTzer sounds like.
|

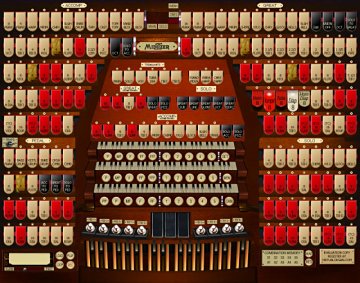
Mighty MidiTzer Style 260 Special
|
|
|
|

![]()
![]()
![]()
![]()
![]()